Cloud Connector
Aus TERRA CLOUD WIKI
Request configuration
You have the option of ordering the Cloud Connector for different connection types:
- Inline configuration
- In this variant, the cloud connector is installed in the network as a normal device with a network card (LAN2).
- In the Cloud Center, please select the following connection type:
- Additional device
- Gateway configuration
- In this variant, the Cloud Connector acts as the primary router. Two network cards are used, one is connected to the Internet, the other to your internal network.
- In the Cloud Center you have the following options, depending on your requirements:
- Primary Router - DHCP
- Primary Router - VDSL
- Primary Router - ADSL (PPPOE)
- Primary router - static IP -
Translated with DeepL.com (free version)
Subsequent configuration adjustment
In certain situations it may be necessary for us to recreate or adjust your Cloud Connector's configuration file.
In this case, your support colleagues will refer you to the terra CLOUD_CC Konfig change form.
This must be filled out by you and sent to us at support@terracloud.de.
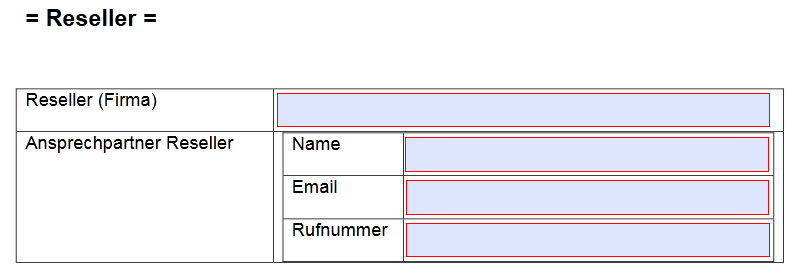
- Please enter your data in the first part of the PDF.
- In the next part, the data of the end customer who will use the Cloud Connector is required.
- You will then be provided with information about the license you have booked for your Cloud Connector.
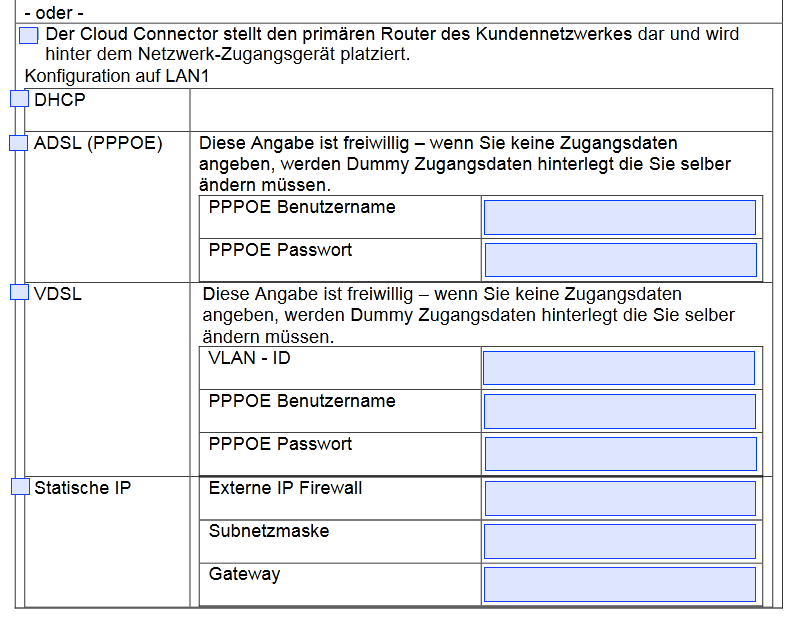
- The next part is about the network connection LAN1 and the connection type you want for your Cloud Connector.
- The first field is about the connection type Additional device. Accordingly, the first network port is not required and you will only be asked for the gateway address of your network.
- The next part is about the Gateway connection type. Accordingly, the exact connection type must be selected for the first network card.
- Finally, an IP address for your internal network is required for the LAN2 network card.
- Please enter your name and current date at the bottom.
Commissioning
Note:
In order for the satellite to be activated for the first time and then configured, it must be connected to an unrestricted Internet connection.
Furthermore, the satellite software does not support proxy servers.
Securepoint webinar on setting up the Cloud Connector
https://www.youtube.com/watch?v=aDAc4WV4MtM
- Connect your computer via Ethernet to the LAN 2 interface of the supplied UTM firewall
- Give your computer the IP address 192.168.175.100
- Go to the URL https://192.168.175.1:11115 in the browser
- Log in with user 'admin' and password 'insecure'
- Accept the license agreements and then cancel the configuration wizard.
- First, import the license (.crt file) under the menu item Extras -> Register
- Under Configuration -> Configuration Management -> Import Configuration, select the .utm file and import it.
- Use the “heart” symbol to load the configuration and use the “star” symbol to set it as the start configuration
- You can then reboot the firewall under Configuration -> Restart.
- Now give your computer an IP from your desired internal network and connect your browser to the IP address of the firewall that you specified in the form.
- Under Authentication -> Users you can change the admin password.
- As soon as the configuration has been imported, the administrator password is: Terra001
- Please note that a corresponding route to the data center is stored in the location's central gateway if you use the Cloud Connector as an additional device.
- As soon as the configuration has been imported, the administrator password is: Terra001
Troubleshooting
No connection to CC
- You cannot connect to the CloudConnector after importing the config:
- Cause:
- You have not changed your local IP from 192.168.175.XX to an IP of the new internal networks
- Solution:
- Adjust IP in Windows manually
- Cause:
- Cause:
- The new internal network is not entered as an admin network in the CC
- Solution:
- Connect the keyboard and screen directly to the CC and enter the network as admin using the console.
- Login: admin and Terra001 (or insecure, but then the config file doesn't seem to have been imported correctly)
- Execute "interface address get" ==> which network is on eth1??? (Ex. IP=192.168.144.1/24 ==> Network=192.168.144.0/24)
- Execute "manager get" and check whether eth1's network is entered there
- if not enter the network with "manager new NETZ"
- Run "system update rule" and "system config save"
- Login: admin and Terra001 (or insecure, but then the config file doesn't seem to have been imported correctly)
- Cause:
Site2Site connection is not established
- The CC does not establish a connection
- Cause:
- The CC has no internet connection
- Solution:
- Under "Network ==> Network Tool" ping 8.8.8.8 ==> if this fails, the CC seems to have no internet connection
- Cause:
- Cause:
- The SSL-VPN service is not started
- Solution:
- Restart or start the SSL-VPN service under "Applications ==> Application Status"
No communication through the tunnel
- VPN is set up but the clients cannot communicate through the tunnel
- Cause:
- If the CC is the primary device in the network, everything should be fine as far as the clients can ping the CC.
- If the CC is in the network as a secondary device, there are two ways to set the routes:
- Solution:
- 1. The local route gets a central route that routes the internal network of the cloud FW towards the CC
- 2. Each client receives a local route for the Internet network of the cloud FW in the direction of the CC
- Cause:
- Cause:
- You did not specify a network or an incorrect network when booking
- Solution:
- Pass on to the support team support@terracloud.de or (-If you have booked several Cloud Connectors in one package, it may be that not all client profiles match the server profile were assigned.
- all profiles that can be seen under "openvpn remote get" should also be visible in the "remote" column when calling "openvpn get" in the line of the server with the name "ssl-s2s".
- all profiles that can be seen under "openvpn remote get" should also be visible in the "remote" column when calling "openvpn get" in the line of the server with the name "ssl-s2s".
- Cause:


