Backup Fehlerdiagnose/en: Unterschied zwischen den Versionen
Die Seite wurde neu angelegt: „'''Error image:'''<br> During an installation/update of the Windows agent you will encounter the following message:<br> <br> border<br> <br> '''Cause:'''<br> There are two possible causes for this:<br> 1. Required Visual C++ libraries are not available<br> <br> 2. The local port 2548 is blocked by another application<br> Known software solutions that cause problems: [https://www.drtax.ch/web/ch/de/index.aspx Dr Tax]<br> <br> '''So…“ |
Die Seite wurde neu angelegt: „'''Error image:''' <br> You receive the following error message when uninstalling the Backup Agent: framed|without '''Cause:''' <br> The error occurs if information about the agent installation (plug-ins) is missing in the Global.vvc file. Each plug-in adds an entry in this configuration file (e.g. Image Plug-in). <br> The error occurs if, during uninstallation, the entries in this file do not match the plug-ins stored on the syst…“ |
||
| Zeile 960: | Zeile 960: | ||
Afterwards, you have to ensure that the port is open either temporarily or, better still, permanently. Once the port is open, the installation/update can be completed successfully.<br> | Afterwards, you have to ensure that the port is open either temporarily or, better still, permanently. Once the port is open, the installation/update can be completed successfully.<br> | ||
<br> | <br> | ||
< | <span id="Windows_Agent_Deinstallation"></span> | ||
=== Windows Agent | === Windows Agent uninstallation === | ||
< | <span id="Fehler_1722_bei_der_Deinstallation_des_Backup_Agents"></span> | ||
==== | ==== Error 1722 while uninstalling Backup Agent ==== | ||
'''Error image:''' <br> | |||
''' | You receive the following error message when uninstalling the Backup Agent: | ||
[[File:Fehler 1722.png|framed|without]] | |||
[[ | '''Cause:''' <br> | ||
''' | The error occurs if information about the agent installation (plug-ins) is missing in the Global.vvc file. Each plug-in adds an entry in this configuration file (e.g. Image Plug-in). <br> | ||
The error occurs if, during uninstallation, the entries in this file do not match the plug-ins stored on the system. | |||
'''Solution:''' <br> | |||
''' | # If you haven't already done so, stop the TERRA Cloud backup services. | ||
# | # Please rename the "Global.vvc" within the installation directory to "Global.old". <br> | ||
# | # Then uninstall the agent | ||
# | |||
<br /> | <br /> | ||
=== Agent Scripting === | === Agent Scripting === | ||
----- | ----- | ||
< | <span id="PreshutdownTimeout_Wert"></span> | ||
==== PreshutdownTimeout Value ==== | |||
==== PreshutdownTimeout | |||
If you are using a Windows Server 2019 machine, special rights are required to change the following registry keys: <br> | |||
<br> | <br> | ||
''HKEY_LOCAL_MACHINE\SYSTEM\CurrentControlSet\Services\gpsvc\PreshutdownTimeout''<br> | ''HKEY_LOCAL_MACHINE\SYSTEM\CurrentControlSet\Services\gpsvc\PreshutdownTimeout''<br> | ||
<br> | <br> | ||
Please make sure you can edit the group policies with the logged in user.<br> | |||
<br> | <br> | ||
[[ | [[File:Permissions_gpsvc.png|border|Permissions must be changed]] | ||
<br> | <br> | ||
Please use “Advanced” to assign permissions to the respective user owners. <br> | |||
<br> | <br> | ||
[[ | [[File:Permissions for gpsvc.png|border]] | ||
<br> | <br> | ||
In this case, owner permissions are required. <br> | |||
<br> | <br> | ||
[[ | [[File:Owner Berechtigung.png|border|Owner]] | ||
<br> | <br> | ||
You should then be able to adjust the registry key accordingly.<br> | |||
<br /> | <br /> | ||
< | <span id="Windows_Agent_dateibasiertes_Backup"></span> | ||
=== Windows Agent file-based backup === | |||
=== Windows Agent | |||
<div lang="de" dir="ltr" class="mw-content-ltr"> | <div lang="de" dir="ltr" class="mw-content-ltr"> | ||
Version vom 19. Januar 2024, 11:19 Uhr
VSS-Troubleshooting Guide
Error image:
The backup is aborted or completes with errors. VSS errors/errors are displayed in the logs (e.g. VSS -E-05408 or VSS -E-05591).
VSS errors can come in many different forms.
Possible causes:
The VSS providers are used by another process (additional backup software, additional backup jobs). The VSS providers are not fully available or are defective.
The agent requires functional VSS providers. We rely 100% on Microsoft VSS - ours
Agent does not come with its own VSS providers. If there are problems with Microsoft VSS, it may be
errors come.
Recommendation for action:
1. Check the schedule. It is not possible to start multiple backup jobs on the system at the same time because the VSS components then compete.
2. Restart the server once. A reboot often helps to solve VSS problems.
3. Install all available Windows updates.
4. Additional storage is required for VSS snapshots. Check whether you have enough free memory on the system (at least 25 GB).
5. Disable third-party backup software (Acronis, Backup Exec, etc.).
6. The shadow storage size limit should be adjusted. Run the following command per existing volume:
- vssadmin resize shadowstorage /for=<drive letter:> /on=<drive letter:> /maxsize=10GB
- Example:
- vssadmin resize shadowstorage /for=c: /on=c: /maxsize=10GB
- vssadmin resize shadowstorage /for=d: /on=d: /maxsize=10GB
7. Delete old VSS snapshots using the command:
- vssadmin delete shadows /all
8. Check the status of the existing VSS writers and providers:
- "vssadmin list writers" and "vssadmin list providers"
- If there are any errors, they should be corrected. For this you can e.g. B. Conduct online research.
9. Check the Windows Event Log. Check for errors that occur at the time of backup.
- It often helps to search the internet for the event ID of the error to get a clue as to the actual cause of the error.
10a. If you have configured a file-based BMR job:
- Install the Image Plugin and create an image-based BMR job. Test whether the behavior also occurs with this.
10b. If you have configured an image-based BMR job: Create a file-based BMR job.
11. Create VSS snapshot manually:
- On Windows Server operating systems, a VSS snapshot can be created using PowerShell. We recommend testing this if you have VSS problems.
- You can create a snapshot manually using the following command:
- vssadmin create shadow /for=C:
- As an example, we have created a snapshot for C: If this is not possible, there are fundamental VSS problems on the system that are not caused by the TERRA CLOUD Backup Agent.
Please note that a successful shadow copy of the C: volume does not reflect that there are no VSS issues. For a BMR backup, all existing VSS writers must be functional, while for a volume or file & folder backup not all existing VSS writers are addressed!
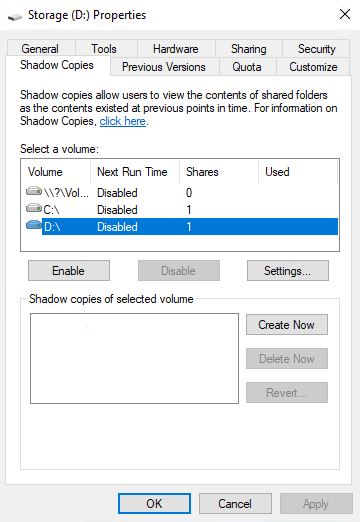
VSS graphical interface
In addition to accessing via PowerShell, you can also access the Microsoft Shadow Copy Service via a graphical interface.
Using this interface you can e.g. b.
- Configure the shadow storage on which the shadow copies are stored (e.g. define the size)
- Create shadow copies manually, for example to check how it works
Via the properties of a volume, you can access the graphical interface via the "Shadow Copies" tab:
Hyper-V VSS Writer exclusion
Error image:
Backup jobs with the BMR option fail due to Microsoft VSS error messages on a Hyper-V host.
Problem:
Only the system partition on a physical Windows server ("host") with the Hyper-V role activated is backed up.
The virtual machines (located on a different partition) are explicitly backed up using the agent.
During the backup of drive C:, the backup agent on the HOST also puts the VMs in the "Backup in progress" state, i.e. activates a VSS functionality.
Cause:
The backup agent only triggers the Microsoft VSS provider to put the system itself (not "just" what was included) into a consistent state.
At the time the snapshot is created, the operating system does not "know" that actually only C is affected.
Only the agent reads, compresses, encrypts and transfers from the VSS snapshot only the data included in the job.
According to current knowledge, the Hyper-V VSS Writer is responsible for the behavior described.
Solution:
A BMR backup of the Hyper-V host is not recommended; you can find a separate article about it at: Backup of a Hyper-V Host.
If you still want to back up the C partition, we ask you to exclude the Hyper-V VSS Writer from the backup:
Hyper-V VSS Writer exclusion instructions:
1.) Stop the TERRA CLOUD Backup agent services using Powershell:
Get-Service -DisplayName "TERRA Cloud Backup*" | Stop service
2.) You will find the job configuration files (<job name>.vvc)
in the installation directory
Example:
- "BMR.vvc".
Create a copy of the job file, e.g. named "BMR.vvc.backup"
Edit the job file "BMR.vvc" and add the following part to the end:
VSSWriterBackup001 {
Name = Microsoft Hyper-V VSS Writer
InstName =
ID = 66841cd4-6ded-4f4b-8f17-fd23f8ddc3de
Include = ".\*"
Options = 4
}
If it is a cluster, there is certainly a writer for the cluster shared volumes in the system (you can find out via vssadmin list writers).
If this is the case, this writer should also be excluded:
VSSWriterBackup002 {
Name = Cluster Shared Volume VSS Writer
InstName =
ID = 1072ae1c-e5a7-4ea1-9e4a-6f7964656570
Include = ".\*"
Options = 4
}
3.) Start the TERRA CLOUD backup agent services using Powershell:
Get-Service -DisplayName "TERRA Cloud Backup*" | Start service
4.) Run a backup
5.) If the backup could not be carried out successfully or the problem still occurs, please re-import the previously saved job configuration file.
VSS -E-05600 - System Writer missing - BMR not available
Error image: You receive the following error message in the log file: VSS -E-05600 System Writer Components - No Prescribed Writer Present (Writer ID E8132975-6F93-4464-A53E-1050253AE220) Additionally in your backup job in the backup selection that BMR is not available:
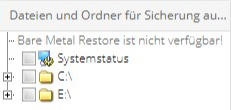
The Microsoft VSS System Writer also does not appear in the list of writers.
You can display the VSS Writers either in PowerShell or in the CMD with the following command:
vssadmin list writers
Cause:
The causes of a missing system writer can be very different, so each case must be considered individually.
Please note that a functional Microsoft VSS service is the basis for all application-consistent backups via TERRA CLOUD Backup.
This error is basically a problem with the operating system itself and not with the backup agent.
Recommendations for action:
Before you start troubleshooting the System VSS Writer, it is recommended to check the recommendation for action in the following article: A4gt A network share causes a BMR job to fail
Alternatively, here are our recommended troubleshooting steps:
- Please reboot the system and check the status of the VSS writers (vssadmin list writers) present on the system
- If the writer is still not available, please check the Windows Event Logs for existing entries at the time of the backup attempt
- If there are entries here, we recommend conducting an online search for the event IDs
Recommended Microsoft contribution to this error image:
Missing System Writer Case Explained
Microsoft error code 0x80070018 in connection with a missing system writer
Error image:
You will find the error code 0x80070018 VSS Error XML document is too long in the Windows Application Logs.
Recommendation for action:
Please check the following article from Microsoft regarding this error:
VSS Error XML document is too long
A notice:
The System Writer is part of the operating system, so we can only give you recommendations. Please contact Microsoft Support to resolve the issue.
A network share causes a BMR job to fail
A possible error when processing a BMR job:
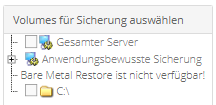 A possible error message in the log file of a BMR job:
VSS -W-08381 Writer System Writer: <STABLE> <FAILED_AT_PREPARE_SNAPSHOT(0x800423f0 - VSS_E_WRITERERROR_INCONSISTENTSNAPSHOT)> <FAILED_AT_PREPARE_SNAPSHOT(0x800423f0 - VSS_E_WRITERERROR_INCONSISTENTSNAPSHOT)>
A possible error message in the log file of an image backup job:
SV -E-09487 GetVolumeInformationW function failed for \\NETWORK SHARE\ (Operating system error: The syntax for the file name, directory name, or volume label is incorrect.)
Recommendation for action:
The System Writer (VSS) responsible for a BMR backup cannot handle network paths. Therefore, you should find out which system-relevant component points to a network path.
This is often a service of the affected system.
You can check whether an existing service points to a network path using the following PowerShell command:
Get-WmiObject win32_service | select Name, PathName
If a \\path\ can be seen under the PathName output, a problematic reference exists.
The following options remain:
1) You ensure that the affected service points to a local path. For this purpose, our specialist dealers have usually contacted the software manufacturer of the affected service.
2) You remove the affected service so that a BMR backup is possible again.
3) You change the backup set from a BMR backup to a backup of individual files/folders or volumes.
If no \\path\ is visible under the PathName output, it is recommended to also check the details of the Microsoft VSS Writer for network paths.
Instructions on how to read these details can be found in the following article:
Read out details of the Microsoft VSS Writer
DISK-E-04205 - Error searching for file GLOBALROOT\Device\HarddiskVolumeShadowCopyXY\windows\\systemroot\system32\drivers\*
Error image:
DISK-E-04205 Error searching for file GLOBALROOT\Device\HarddiskVolumeShadowCopyXY\windows\\systemroot\system32\drivers\%NAME%
DISK-E-04101 Operating system message: The syntax for the file name, directory name, or volume label is incorrect.
Cause:
The entry or reference in the registry indicates a non-existent or incorrect path.
Solution approach:
The path in the registry must be adjusted; you can find the relevant reference at:
Computer\HKEY_Local_Machine\System\CurrentControlSet\Services\%FILE NAME ERROR MESSAGE%
We recommend that you export the corresponding entry before making changes to the registry.
An adjustment to the following entry is often sufficient; you may have to check the existing path and adapt the entry specifically:
%systemroot%\system32\DRIVERS\%FILE NAME ERROR MESSAGE%.sys
After the entry has been adjusted, the system must be restarted to apply the change.
VSS -E-05658 VsscBackup::createSnapshotMap 2 internal error
Error image:
You get the following error in the log file:
VSS -W-05408 Error adding volume to snapshot set: Volume <\\?\Volume{GUID}\> <\\?\Volume{GUID}\> (OS Error: 0x8004230c VSS_E_VOLUME_NOT_SUPPORTED)
VSS -E-05658 VsscBackup::createSnapshotMap 2 internal error
SV -E-09487 GetVolumeInformationW function failed for Volume{GUID} (OS error: The device is not ready)
Cause:
The Microsoft VSS service cannot create a snapshot for the volume in question because the volume (e.g. a USB stick) is not supported.
This can be caused, for example, by the "Entire Server" option in the backup set of a file-based backup job, as volumes for which VSS snapshots cannot be created are included in the backup. In this case, please remove the option from the backup set and add the volumes to be backed up individually.
The error regarding the "Entire Server" option in connection with a file-based job has already been forwarded to the software manufacturer.
Recommendation for action:
Please check which volume it is using the GUID. You can use the following PowerShell script:
Write-host "Please enter the GUID of the volume (the contents of the curly brackets)"
$GUID = ReadHost
$pattern = "\\?\Volume{GUID}\"
$pattern = $pattern.Replace("GUID", $GUID)
Get-Volume -UniqueId $pattern | Select-Object -Property UniqueId,FileSystemLabel,DriveLetter | Out-GridView
DISK-W-08197 Cannot check file for hard links (Windows\System32\LogFiles\Sum\无ǽ)
Error image:
You will receive the following warning message in the log file:
"Unable to check file for hard links: \\?\GLOBALROOT\Device\HarddiskVolumeShadowCopy14\Windows\System32\LogFiles\Sum\无ǽ (OS error (0x2): The system cannot find the specified file)"
Cause:
The operating system cannot check the listed file for hard links due to the special characters.
Solution:
These are standard files of a Microsoft installation that are not relevant to the function of the server.
This means you can delete the \Sum folder (Windows\System32\LogFiles\Sum\) without any problems.
Afterwards, the error will no longer appear in the log file and the backup will run successfully again.
FAILED_AT_FREEZE - VSS_E_WRITERERROR_TIMEOUT)> 0x800423f2
Error image:
You receive the following error message in the log file:
FAILED_AT_FREEZE(0x800423f2 -VSS_E_WRITERROR_TIMEOUT)
Cause:
A VSS writer times out trying to bring his application into a consistent state. One reason for this can be performance problems with the system.
Recommendation for action:
Please follow the usual steps for resolving VSS errors.
If the error persists in subsequent backups, we recommend increasing the timeout for the VSS snapshot.
The following article explains increasing the timeout:
https://blogs.technet.microsoft.com/asiasupp/2011/08/01/windows-server-backup-failed-to-backup-with-error-0x81000101/
VSS -E-05408 - VSS_E_UNEXPECTED_PROVIDER_ERROR
Windows Agent
Error image:
You receive the following error message in the log file immediately after starting the backup:
VSS -E-05408 Error adding volume to snapshot set: Volume <\\?\XY}\> <\\?\Volume{XY}\> (OS Error: 0x8004230f VSS_E_UNEXPECTED_PROVIDER_ERROR)
---
VSS -E-05408 error adding volume to snapshotset: Volume <\\?\XY}\> <\\?\Volume{XY}\> (OS error: 0x8004230f VSS_E_UNEXPECTED_PROVIDER_ERROR)
Cause:
The TERRA CLOUD Backup Agent tries to use an incorrect VSS provider.
Solution:
Please check which VSS providers are stored on the system using the following command using CMD or PowerShell.
vssadmin list providers
The TERRA CLOUD Backup Agent must use Shadow Copy Provider 1.0.
If there are other VSS providers on the system, the following REG key can help:
The entry ensures that the Shadow Copy Provider 1.0 is used when creating the snapshot for the TERRA CLOUD Backup Agent. This must be created manually.
HKEY_LOCAL_MACHINE\SOFTWARE\EVault\InfoStage\Agent\UseSystemVSSProvider = 1 (DWORD value 32-bit)
Hyper-V Agent
Error image:
You receive the following error message in the log file immediately after starting the backup:
VSS -E-05408 Error adding volume to snapshot set: Volume <\\?\XY}\> <\\?\Volume{XY}\> (OS Error: 0x8004230f VSS_E_UNEXPECTED_PROVIDER_ERROR)[Host1]< br>
---
VSS -E-05408 error adding volume to snapshotset: Volume <\\?\XY}\> <\\?\Volume{XY}\> (OS error: 0x8004230f VSS_E_UNEXPECTED_PROVIDER_ERROR)[Host1]
Cause:
The TERRA CLOUD Backup Agent tries to use an incorrect VSS provider.
Example:

Solution:
- Get the provider identifier from the output of the following command: vssadmin list providers
- Run Registry Editor (regedit)
- Back up the affected registry entries.
- Delete the corresponding registry key from the following path: HKLM\System\CurrentControlSet\Services\VSS\Providers
- Search the registry for the provider ID and remove any existing references.
- Open Component Services by typing "dcomcnfg" in the command prompt.
- Open Component Services -> Computer -> COM+ Applications and remove the Third Party VSS Provider entry.
- Then reboot the affected host.
Note: This adjustment must be made per affected host!
VSS -E-05616 - 0x8004231f VSS_E_UNKNOWN
Error image:
You receive the following error message in the log file:
VSS -E-05616 Snapshot could not be created (OS error: 0x8004231f VSS_E_UNKNOWN (OS error (0x8004231F): unknown error code 0x8004231F))
Cause:
This Microsoft error code can be caused by too little free space on a backed up volume or shadow copy storage that is configured too low.
Recommendation for action:
Ensure that each existing volume has at least 10% free usable capacity. This ensures that the required VSS component can create shadow copies without errors.
Check how much shadow copy storage is allocated to the existing volume(s) using vssadmin list shadowstorage.
The allocated shadow copy storage can be adjusted using the following command:
vssadmin resize shadowstorage /for=<drive letter:> /on=<drive letter:> /maxsize=10GB
Example:
vssadmin resize shadowstorage /for=c: /on=c: /maxsize=10GB
vssadmin resize shadowstorage /for=d: /on=d: /maxsize=10GB
If one of the commands says "No results were found for the query." reports, there seems to be a problem with the configuration. In this case, you should control/adjust the shadow copy storage manually:
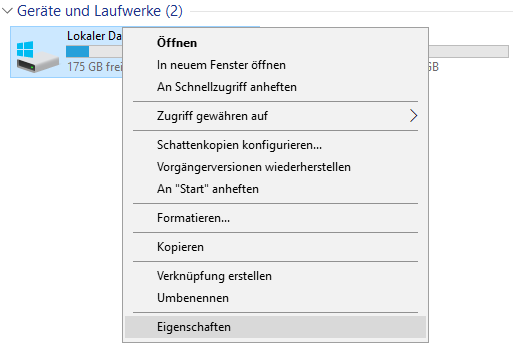
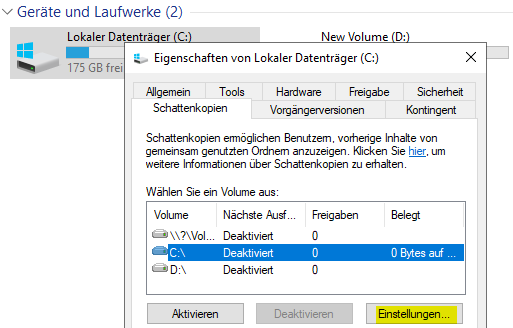
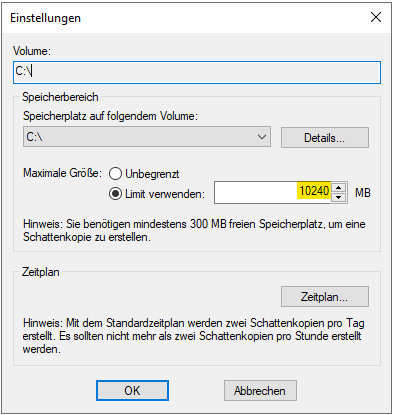 We recommend storing the value 10240 MB per affected volume. For larger volumes (2-4 TB) you can also increase the value to 20480 MB.
You can also test whether a manual shadow copy can be created:
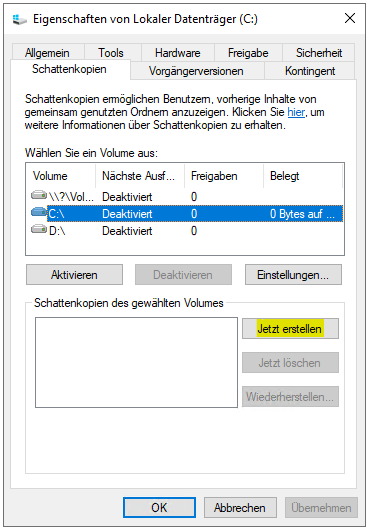 A functional BMR backup via TERRA CLOUD backup can only be created if all volumes can successfully create a shadow copy.
VSS -W-05408 - 0x80042317 VSS_E_MAXIMUM_NUMBER_OF_SNAPSHOTS_REACHED
Error image:
You receive the following error message in the log file:
VSS -W-05408 Error adding volume to snapshot set: Volume <\\?\Volume{XY}\> <\\?\Volume{XY}\> (OS Error: 0x80042317 VSS_E_MAXIMUM_NUMBER_OF_SNAPSHOTS_REACHED)
Cause:
Microsoft VSS allows a maximum of 64 shadow copies on a system. It is not possible to request another shadow copy for the TERRA CLOUD backup; the agent passes on the operating system message in the log file.
Recommendation for action:
Please check how many shadow copies exist on the system. To do this, you can enter the following command in the command line with administrative permission:
vssadmin list shadows
These shadow copies should either be moved to another shadow copy storage or deleted.
If another software solution based on Microsoft VSS is used, it should be ensured that there are no overlaps between the backup windows.
Recommended Microsoft posts about VSS
You can find extensive documentation on the Volume Shadow Copy Service at: Microsoft VSS Documentation
Read details of the Microsoft VSS Writer
Each VSS writer is responsible for its own area, e.g. the system status or the registry. With the help of the following instructions you can see which directories and folders the respective writers are responsible for. This evaluation can be very helpful when analyzing a VSS problem, for example to locate an .exe file on a network share. Please note that "Diskshadow" is only available on server operating systems. Directions:
- Please open the CMD with administrative permission
- Create the directory "C:\temp"
- Run the following command "DISKSHADOW /l c:\temp\diskshadow.txt"
- Run the following command "LIST WRITERS DETAILED"
- You will find the output in the created "Temp" directory
AFC Logs
AFC stands for Agent Forensic Ccollector, in addition to the backup and restore log files, this tool also collects other important information from a system on which a Windows agent is installed.
These extensive log files are essential for diagnosing many error patterns.
AFC Logs Windows and vSphere Recovery Agent
Download:
The current version of the AFC tool can be found at:
https://backup.terracloud.de/download/afc.exe
The configuration in the tool can be as follows: Screenshot can be taken.
The following link can be used to upload:
AFC Logfile Upload
Please provide a short upload confirmation to TERRA CLOUD Support.
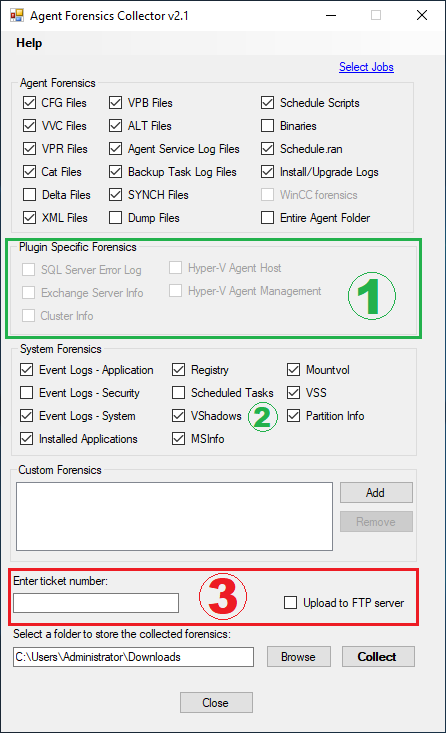 Notes:
- Please select any available option here.
- The VShadows option is only available on server operating systems.
- The "Upload to FTP server" function points to the FTP server of our software manufacturer. Therefore, please use the above. Upload link.
AFC Logs Hyper-V Agent
Download:
The current version of the AFC tool can be found at:
https://backup.terracloud.de/download/afc.exe
The configuration in the tool can be as follows: Screenshot can be taken.
Please run the AFC tool on all hosts and the management system.
The following link can be used to upload:
AFC Logfile Upload
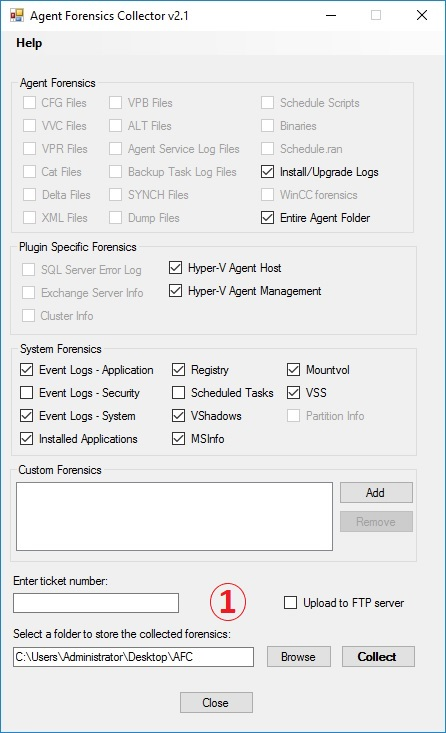 Notes:
- The "Upload to FTP server" function points to the FTP server of our software manufacturer. Therefore, please use the above. Upload link.
AFC Logs Linux Agent
Download:
The current version of the AFC tool can be found at:
https://backup.terracloud.de/download/AFCforLinux.tar
For most derivatives you can download with the following command:
wget https://backup.terracloud.de/download/AFCforLinux.tar
Collect log files:
- Please unpack the script with the following command: tar -xf AFCforLinux.tar
- Change to the directory where you unpacked the script via cd
- Check your permissions using su or sudo-i depending on the derivative
- Please change the access rights for the afc_linux.sh script with the command chmod 777 afc_linux.sh
- Then run the script via ./afc_linux.sh
- Follow the instructions in the script and enter your support ticket number, alternatively you can enter the order number of the backup package
- Optionally you can add files (e.g. screenshots)
- The AFC logs can be found in the /tmp/ directory with the name “AFC-<ticket_number>-<hostname>-<YYYY-MM-DD-HH-MM-SS>.tar[.gz]”
- AFC Logfile Upload
- Please provide a short upload confirmation to TERRA CLOUD Support
TERRA CLOUD Backup Portal
Computer / Backup Agent is shown as offline since 01.01.0001
Error image:
The computer / backup agent is displayed in the portal as "Offline" since January 1st, 2001, even though the agent's services are active.
The error pattern looks identical for the different agents (Windows, Linux, Hyper-V and VMware):

Cause:
The backup agent cannot communicate with the portal servers (AMP servers) via TCP port 8087.
However, registration on the backup portal via TCP port 8086 was possible, otherwise the system would not be displayed at all.
Solution:
Please release the TCP port 8087 to the outside world for the system on which the backup agent is installed.
For more information, see Network Configuration.
Technical problems have occurred. Service will be restored as soon as possible.
Error image:
You receive the following error message when you try to add a computer to the Vault:
![]() Cause:
Cause:
The agent cannot communicate with the agent management systems via TCP port 8087, see network configuration, so no adjustments can be made to the configuration.
Solution:
Please check the network configuration of the agent system. After customization, restart the agent services.
Then register the computer with the vault.
Users can only retrieve their own Vault profiles
Error image:
You receive the following error message when attempting to register a system with the Vault:
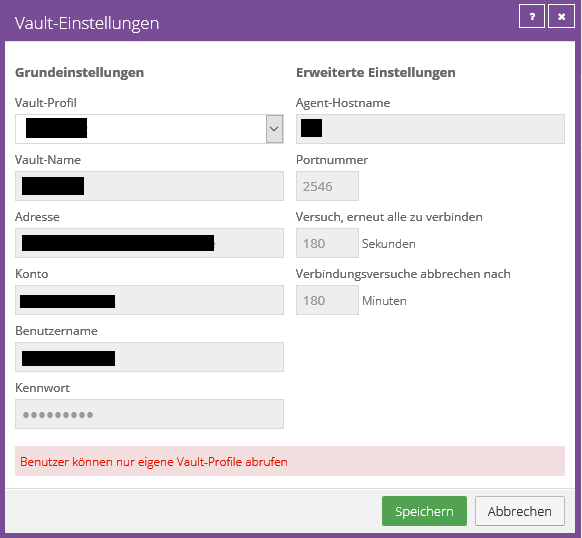
Cause:
This error message appears because not all portal servers can yet access this Vault profile.
Distributing the information to all portal components can take up to 5 minutes.
Solution:
Logging in again can speed up this process and thus resolve this error message.
UPDT-E-10320 - Could not upgrade the Agent. The system must be restarted
Error image:
After starting the upgrade process, you will receive the following message in the backup portal:
You must restart this computer for the agent software configuration change to take effect.

In the BUAgent log file you will find the following error code:
UPDT-E-10320 Could not upgrade the Agent. The system must be restarted
Cause:
A registry key on the system being backed up prevents the agent from being updated. This key is usually emptied by restarting.
Recommendation for action:
Please check the following article as the procedure is identical:
Pending restart
Email notification: Backup not performed - System XY - TERRA CLOUD Backup
Error image:
You will receive a notification that one of your configured backups was not performed, even though a current backup of the system exists.
The times in the notification also do not match the overview in the portal.
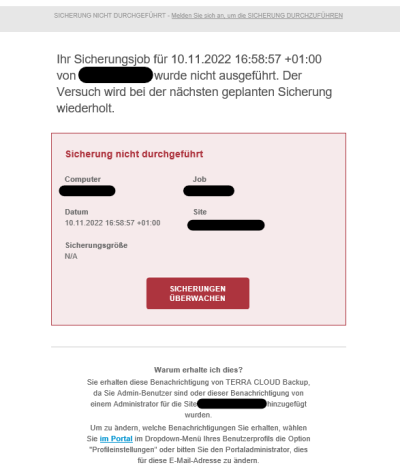 Cause:
It often happens that the last / first day of a month falls on a weekend / holiday. For systems that do not run 24/7, this means that monthly backups are not carried out.
As soon as a backup is missed, the agent stores a "MISSED" entry in the Schedule.ran file of the respective system. (C:\Program Files\TERRA Cloud Backup\Agent\Schedule.ran)
The problem here is that this entry is only updated by a scheduled backup, so an ad hoc backup is not sufficient to update the status.
Every time the system starts, the agent queries the Schedule.ran and sends a notification if a missed status is visible here.
Recommendation for action:
Our software manufacturer has already been informed about this problem, so they are already working on a permanent solution.
Unfortunately, we do not yet have any more detailed information about the implementation. We will inform you via our news feed in the backup portal as soon as the problem has been resolved.
In the meantime, you can remove the Schedule.ran (C:\Program Files\TERRA Cloud Backup\Agent\Schedule.ran) to stop the notification.
The file will be recreated the next time the agent processes it, so you don't have to continue monitoring the situation after deletion.
Email Notification: Enter valid email addresses separated by commas
Error image:
When configuring an email notification, you receive the following error message:
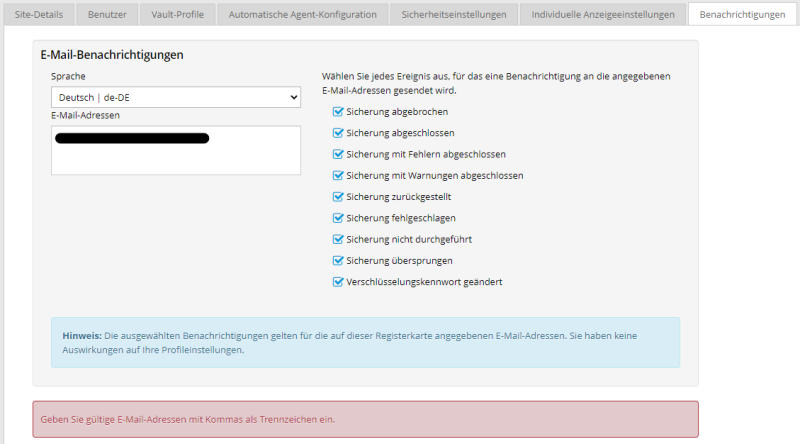 Cause:
Until recently, account numbers were not unique in site details, which is now causing problems in isolated cases.
If you e.g. For example, if you have entered a number between 1 and 100 or your Wortmann customer number as your account number, it may well be that this is already in use at another site.
Once an account number is used across multiple sites, errors occur when saving a customization.
Recommendation for action:
A site's Account Number field currently has no real meaning, so the simplest solution is to remove the account number.
Alternatively, you would have to enter an account number that is not assigned so that changes such as B. the configuration of the email notification can be saved.
RSYN-W-07716 Failed to connect to or negotiate backup with alternate vault.
Error image:
You will receive the following warning in the log file of a backup:
RSYN-W-07716 Failed to connect to or negotiate backup with alternate vault.
The error pattern looks identical for the different agents (Windows, Linux, Hyper-V and vSphere).
Cause:
The backup agent cannot communicate with the required vaults via TCP port 2546.
This is often the secondary vault (replication partner) or the base vault when using a satellite.
Solution:
Please enable the TCP port 2546 for the vault address(es) specified in the log file (it is best to change the log file from "Only errors and warnings" to "Entire log" and check it).
Further information can be found at: Configuration Network Configuration.
Windows Agent
Windows Agent General
No connection between Agent and Vault
Error image:
The agent was unable to connect to the vault. Vault address, port number, or credentials may be invalid.
Causes:
- The login details you entered are incorrect.
- Communication with the affected vault system is not possible.
- A strict firewall configuration (IPS, Proxy or TLS) blocks the connection
The following port must be enabled for communication between Agent and Vault:
- 2546 TCP
Review:
You can check the connection using the following PowerShell command:
- Test-NetConnection vault-wmh1-p002.terracloud.de -Port 2546
(Please use the correct vault address here, see account provision email)
If the process is not possible despite the port being open, you should check the access data of the affected Vault profile. To do this, go to the “Sites” tab, select the affected customer site and edit the existing entry. Enter the access data from the provision email 1:1 here. (if necessary, copy it into a notepad beforehand to be on the safe side)
A strict firewall configuration (IPS, Proxy or TLS) can also ensure that the connection remains intact despite the above. Preparations are not possible. Here you should always ensure that communication between the agent and the vault system can take place undisturbed.
Natively protected data amount differs from the actual memory consumption
Error image:
The natively protected data set is incorrectly displayed in the job details or in a report in the TERRA CLOUD Backup Portal.
Possible causes:
Unlimited VSS shadow copy storage:
Shadow copy storage space is defined for each volume by the operating system, the maximum size can be either a total value, e.g. 10240 MB or "unlimited".
Please check whether a fixed and therefore not unlimited shadow copy storage is defined for all volumes.
Difference due to the VSS shadow copies:
The size of the created shadow copies is added to the native data amount because the shadow copy takes up storage space at the time of measurement and backup.
Once the backup is complete, the shadow copies are removed and the native data amount decreases. This effect is particularly noticeable when backing up large volumes with low storage usage.
The development team of our software manufacturer is already working on optimizing the measurement time.
Shadow copy storage configuration:
You can configure the shadow copy storage via the graphical interface.
Alternatively, you can also carry out the configuration via CMD or PowerShell:
vssadmin resize shadowstorage /for=<drive letter:> /on=<drive letter:> /maxsize=10GB
Example:
vssadmin resize shadowstorage /for=c: /on=c: /maxsize=10GB
vssadmin resize shadowstorage /for=d: /on=d: /maxsize=10GB
Windows Server Deduplication:
This Windows Server role enables deduplication of data on the server. The compressed and deduplicated data is displayed to you via Windows Explorer.
However, the backup agent transmits the uncompressed original size of the backup set as meta information.
Please check whether the role is installed on the relevant server using the following PowerShell command:
Get-WindowsFeature -Name FS-Data-Deduplication
The role should be installed:
Please exclude the "Chunk Store" folder under the "System Volume Information" directory from the backup.
After the next backup is completed, the measured natively protected data amount should be correct again.
Recommendations:
In order to determine and analyze the storage space used on a volume, we recommend, in addition to Windows Explorer, the free tool TreeSize Free.
If the natively protected amount of data even after the above mentioned If the adjustments still differ and it is a file-based job, you can still try to reduce the amount of data by excluding the System Volume Information folder (one exclusion for each system volume).
Backup of removable storage devices using the "Entire Server" job configuration
Error image:
A backup job with the “Entire Server” configuration includes removable storage devices such as: B. external USB hard drives or USB sticks in the backup.
Cause:
The value “Fixed” is stored for the “DriveType” property of the drives/volumes of the removable storage devices, which represents the storage device as permanently installed.
The backup agent checks this property and includes all drives with the “Fixed” property, including incorrectly configured removable drives.
You can read the "DriveType" property of the respective drives/volumes using the following PowerShell command:
Get-Volume | Format-List -Property DriveLetter, DriveType
Solution:
Option 1:
Remove the removable drives from the system at the time of backup.
Option 2:
Remove the "Entire Server" option from the job configuration and switch to the "Bare Metal Restore" option plus the additional drives you want.
Invalid file format or delta map file is corrupted
Error image:
Jun 7th 22:15:38 DELT-E-04355 Invalid file format C:\Program Files\TERRA Cloud Backup\Agent\JOBNAME\0000xxxx.DTA
Jun 7th 22:15:38 BKUP-E-08196 Your delta mapping file is corrupted. Delete or rename the file and sync it with your Director. [VV]
Cause:
The error message states that the delta file (0000000X.DTA) or delta mapping file (0000000X.DTX) is corrupted.
The delta file contains checksums of the blocks that have already been backed up, the delta mapping file is an index file for the delta file.
This file is needed so that the agent knows which blocks have already been backed up and which have been added or changed.
Solution:
Please carry out a backup reset. Instructions can be found in the following entry for a very similar error:
DELT-E-05782 - Delta file damaged 0000000X.DTA file is damaged: hash mismatch
Server0.Password requires a value
Error image:
A backup fails immediately after starting with the following message in the log files:
PARS-E-05152 A value is required for Server0.Password
Cause:
A configuration file (Global.vvc) is missing the hash value for the vault password.
Without this entry, the agent cannot authenticate itself to the vault system.
Solution:
Please re-enter the vault password in the Backup Portal by going to “Vault Settings” and editing the existing configuration:
See also 2.1.1
DELT-E-05782 - Delta file corrupted 0000000X.DTA file is corrupt: hash mismatch
Error image:
You receive the following error message in the log file of a backup job:
DELT-E-05782 C:\Program Files\TERRA Cloud Backup\Agent\Jobname\0000000X.DTA file is corrupt: hash mismatch
Cause:
The error message says that the delta file (0000000X.DTA) is corrupt, this file contains checksums of the saved blocks from the last backup.
This file is needed so that the agent knows which blocks have already been saved and which have been added or changed.
Solution:
Please run the Backup Assistant on the affected system, switch to the Agent Functions tab and start the action Backup Reset.
If it is not possible to use the Backup Assistant, you can alternatively use the following PowerShell script:
backup reset script
Among other things, this script deletes the damaged delta file and carries out a synchronization, thereby creating the delta file again.
Depending on the system size, synchronization can take some time.
SSET-W-04210 - Error during collection function [VV]
Error image:
You receive the following error message in the log file of a backup job:
SSET-W-04210 Error during collection function [VV]
Recommendation for action:
Please open a support ticket for this error as the backup job needs to be analyzed on the vault.
This process may take some time depending on the size of the backup job.
We recommend that you create a replacement job for the analysis period so that the system can continue to be protected via the TERRA CLOUD backup.
PARS-W-04784 - Due to computer registration, the following information is missing from the "Name Backup Job" configuration file: Enc_Password (Encryption Password)
Error image:
You will receive the following warnings in the log file of a backup job, which will cause the backup job to abort:
PARS-W-04784 Due to computer registration, the following information is missing from the configuration file "BMR":
PARS-W-04785 Enc_Password (Encryption Password)
PARS-W-04786 Re-enter the missing information using the Agent Console.
Cause:
The hash value of the encryption password is stored in the job configuration file in the agent directory when the backup job is created or the encryption password is changed.
Reinstalling the agent in conjunction with re-registration ensures that the job configuration file without the hash value is downloaded from the vault.
Please note that the hash value of the encryption password does not leave the agent system.
Solution:
Please edit the backup job and enter the encryption password again.
In any case, you will receive the message regarding a possible reseeding, as the agent cannot check at this point whether the encryption password entered is correct.
BUAgent service cannot be started (Error 1053)
Error image:
The BUAgent service cannot be started. You will receive a pop-up window with the error message "Error 1053: The service did not respond to the start or control request in a timely manner."
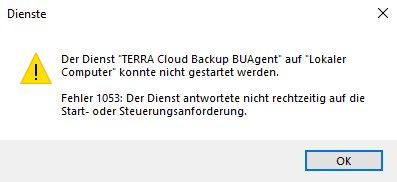 Causes:
As of agent version 8.90, the packages "Microsoft Visual C++ 2017 Redistributable (x64) and (x86) are required; these are not installed on the system.
Solution:
Please run the setup of Agent 8.90 or newer again, this checks whether the two packages mentioned above are installed and reinstall them using the "Repair" option.
Illegal function
Error image:
The affected system is displayed as “Offline” in the Backup Portal even though it is in use.
The “TERRA Cloud Backup BUAgent” service is not running:
![]()
When you try to start the service you will receive the following error message:
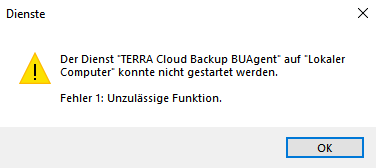
Cause:
The “TERRA Cloud Backup BUAgent” service accesses a configuration file (Global.vvc) in the agent’s installation directory. This file contains, among other things, settings for the agent,
that you have configured in the portal (e.g. a bandwidth limit).
With this error, this configuration file is empty, incomplete or damaged.
Without a healthy Global.vvc file, the agent cannot back up.
Recommendations for action:
To troubleshoot the error, you can first open the Global.vvc file in the installation directory, e.g. with the editor. In this case the file is empty.
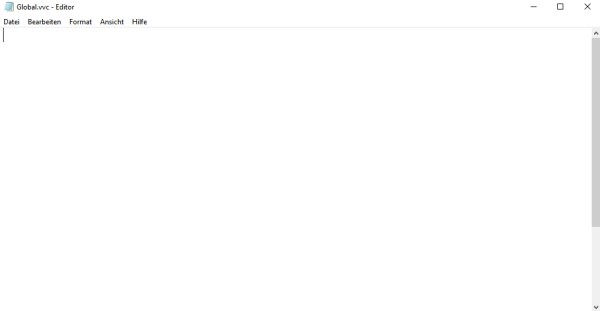
This empty Global.vvc can be removed.
After deleting the file, you can perform a repair installation of the agent by entering the agent setup and selecting the following option:
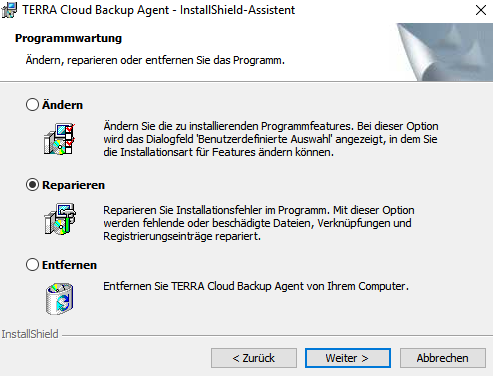
After successful repair installation, the Global.vvc file will be filled with content.
Please re-enter the vault password in the backup portal. You can find instructions for this under "For Server0.Password is a value required“
If the error cannot be solved with these steps, a complete uninstallation followed by an installation of the agent can help. In this case, the configuration files (including Global.vvc) are downloaded from the vault system and stored in the agent directory.
BMR -E-10760 Bare metal backup does not contain system volume. Bare metal restore will not be successful.
Error image:
The error pattern differs depending on the type of backup.
File-based backup:
You receive the following error message in the log file:
BMR -E-10759 System volume <*> is missing BCD files. Bare metal restore will not be successful. ( * = drive letter of the volume in question)
or
BMR -E-10759 System volume <*> is missing BCD files. Bare metal restore will not be successful.
Image Backup:
You receive the following error message in the log file:
BMR -E-10760 Bare metal backup does not contain System volume. Bare metal restore will not be successful
or
BMR -E-10760 Bare Metal Backup does not contain a system volume. Bare metal restore will not be successful.
Possible causes:
- On a UEFI / GPT system there is a drive that has been configured as "active", although there is no boot-relevant data on it.
- On a BIOS / MBR system there is a drive that has been configured as "active", although there is no boot-relevant data on it.
Example:
In this excerpt from the disk management you can see that the partition under the data drive T has been marked as "active", even though there is no boot-relevant data on it.
 Recommendation for action:
Please check the posts linked below on configuring the drives and partitions.
If a drive was incorrectly marked as "active", you can correct this using the tool Diskpart using the parameter " "inactive".
Recommended posts from Microsoft:
If the error message occurs even though there is no active drive on the system, we recommend contacting TERRA CLOUD support. When contacting us, please provide the order number or the name of the vault account as well as the log file from the last backup.
BMR backup of a Hyper-V host
Experience has shown that securing physical Hyper-V hosts on which VMs are actively running causes problems with Microsoft VSS. Microsoft VSS tries to put the ENTIRE system (including the CSVs) into a consistent state.
To make this possible, all virtual machines would also have to be paused. Since agent-based backup does not trigger a VSS snapshot via the integration services, there are problems with this.
The general question arises as to why hypervisor servers should be secured at all.
Here are sample articles from the web:
- http://www.altaro.com/hyper-v/hyper-v-backup-strategies-dont-worry-management-os/
- https://www.backupassist.com/blog/support/10-tips-for-best-practice-hyper-v-backups/
- https://www.veeam.com/blog/hyper-v-hosts-to-back-up-or-not-to-back-up.html
Individual files and folders can be backed up without any problems - only BMR has problems.
For this reason it is not supported See function overview
With host-based backup from version 8.60 ONLY the VMs can be backed up, not the host itself (not even files and folders).
We recommend agent-based backup (from the VM) to utilize the full functionality of the backup solution.
If a Hyper-V host fails completely, it should be reinstalled and included in the cluster again.
Backup jobs are piling up in a queue
Error image:
In the backup portal you see several processes in the queue for a system, the current backup job no longer shows any progress.
Recommendation for action:
Please restart the TERRA CLOUD backup services to terminate the open processes.
Get-Service -DisplayName "TERRA Cloud Backup*" | Stop service
Get-Process | ? ProcessName -Match "VV|VVAgent" | Stop Process -Force
Get-Service -DisplayName "TERRA Cloud Backup*" | Start service
SMTP Prober / Mail Notification
Error image:
The backup agent does not send emails according to the defined criteria.
You will receive the following or similar messages in the log file of your backup job:

Recommendation for action:
You can test the stored settings via the backup portal. If the test is not successful, you can carry out the following steps:
- Update the agent to the latest version as the mail notification feature has been updated to current standards in newer agent versions.
- Alternatively to port 25, check port 587 or 465.
- Please use the SMTP Prober Tool to check whether the emails can generally be sent from the system
SMTP Prober
You can download the tool at the following link: http://www.alexnolan.net/software/SMTPProber.htm
If you can successfully send emails from the system using the tool, it is guaranteed that communication with the mail server can be established.
GetVolumeNameForVolumeMountPointW() failed
Cause:
This can happen when database files (MDF or LDF) exist either on a mount point or a symbolic link rather than in a normal physical location.
Example:
You have your logical location for the database files in C:\Program Files\Microsoft SQL Server\MSSQL13.MSSQLSERVER\MSSQL\DATA, but you have created a symbolic link to the data that exists on another drive:
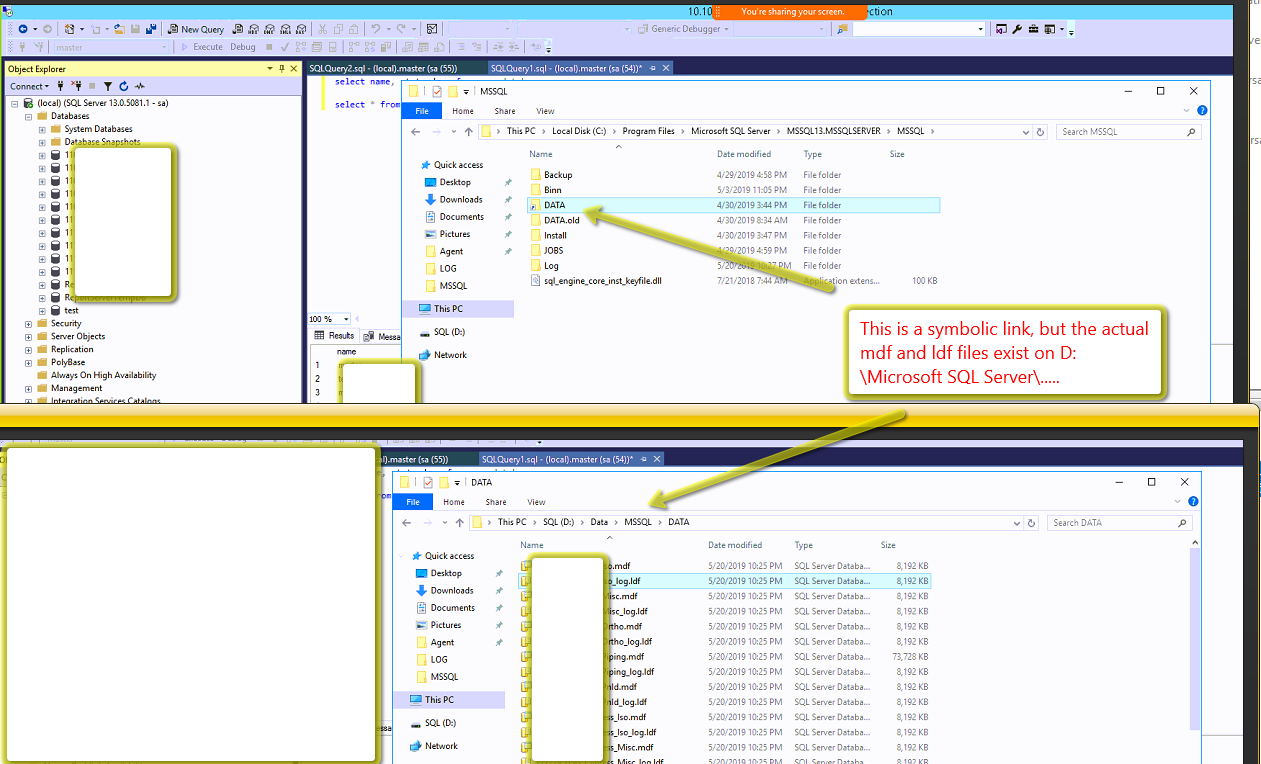
Solution:
The location for the MDF and LDF files needs to be updated.
One way to do this is to detach and then reattach the database.
When the database is mounted, make sure to select the MDF file in the current location (D:\Data\MSSQL\DATA in the above example).
Once the logical reference is updated to the correct path, the backup is successful.
BSTR-E-04145 Error opening file C:\Program Files\TERRA Cloud Backup\Agent\BMR\000000XY.CAT for output
Error image:
BSTR-E-04145 Error opening file C:\Program Files\TERRA Cloud Backup\Agent\BMR\000000XY.CAT for output
BKUP-F-04110 Job could not be completed. [VV]
Cause:
The agent is unable to process the affected file.
Attention: The error message may be a subsequent error.
If there are no further clues in the log file, the following solution can help.
Solution:
Create an exception in the existing antivirus program to give the agent unrestricted access to the files it needs:
C:\Program Files\TERRA Cloud Backup\*
UTIL-E-04101 Operating system message: The system cannot find the specified path
Error image:
You will receive the following error message in the log file:
UTIL-E-04101 Operating system message: The system cannot find the specified path
UTIL-E-05658 PhlWMgr::isSkip() internal error
Cause:
The operating system cannot access all the necessary paths to create a VSS snapshot of the system.
This can be caused by operating system corruption.
Recommendation for action:
Please note that this error is not a problem with the backup agent itself, but with the operating system being backed up.
In past support cases, the system could be checked via the Microsoft System File Checker resolve the cause.
In addition, a check of the file system of the volumes to be backed up using the Mircosoft tool CHKDSK can be helpful.
UTIL-E-04101 Operating system message: Access denied
Error image:
You will receive the following error in the log file of a backup:
UTIL-E-04101 Operating System Message: Access Denied
UTIL-E-05658 PhlWMgr::isSkip() internal error
Cause:
The operating system cannot access all of the necessary files to create a successful VSS snapshot of the system.
In current support cases, we were able to determine a connection between the Windows 11 operating system and the use of Panda Antivirus / OneDrive.
Recommendation for action:
Please note that this error is not a problem with the backup agent itself, but with the operating system being backed up.
Generally you have two options:
- Find out what file(s) it is. Then ensure that the agent/VSS component has successful access to the file(s).
- Switch to an image-based job. Access denials would not occur again in the future because the agent backs up the existing volumes at block level instead of files/folders.
Determination of which file(s) it is
1. Edit the affected job, select the "Advanced backup options" option.
2. Change log detail level from summary to files:
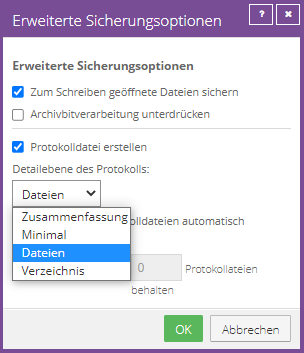
3. Save customization and perform a backup.
4. Search the log of the backup performed using CTRL + F and search for "-E-".
5. The affected file is one line above the error message.
The above Customization results in very large log files, which is why it is advisable to undo them after a backup has been made!
In current support cases we have often found access denied for files in the following directory: C:\Windows\WinSxS\Catalogs\*
Apparently a hard link to the path \$Extend\$Deleted\ ensures that the file cannot be accessed.
One solution mentioned by our customers would be to grant full access to the C:\Windows\WinSxS\Catalogs\* directory for the "Everyone" group. Unfortunately, we do not know the exact instructions/procedure.
UTIL-E-08235 Operating system error 21, message: The device is not ready
Error image:
You will receive the following error in the log file of a backup:
UTIL-E-08235 Operating system error 21, message: The device is not ready
Cause:
The agent has lost access to the required shadow copy, causing backup problems.
Recommendation for action:
However, if you are looking for a new agent, you will be able to contact them. Applications that also require access to VSS shadow copies (e.g. other backup solutions) should be placed approximately 2 - 3 hours (depending on the situation) before or after the backup.
For initial backups or If you have a larger date, please note that the VSS has to be temporarily updated.
Job can not bear beitet / erstellt werden - Job-Fenster schließt sich
Error image:
If you select the action "Edit job" or "New job for local system / Create new image job", the desired window only opens for a short period of time before the following error message is displayed in the portal:
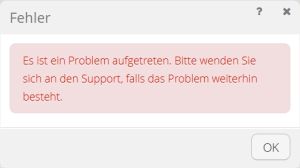
"A problem has occurred. Please contact support if the problem persists."
Causes:
One or more of the system's VSS writers are not functioning.
Solution:
Before you start troubleshooting the System VSS Writer, it is recommended to check the recommendation for action in the following article: A network share causes a BMR job to fail
Alternatively, you can try to repair the non-functional writers via our VSS Troubleshooting Guide:
VSS Troubleshooting
SSET-E-04104 The request failed. The remote server reported the following error: RPC-E-AUTHERROR, authentication failure
Error image:
You will receive the following error in the log file of a backup:
SSET-E-04104 The request failed. The remote server reported the following error: RPC-E-AUTHERROR, authentication failure
Cause:
Our vault rejected the backup request because the dataset was blocked. The blockage can involve the following scenarios:
- The affected agent has a version that is no longer supported. (See newsfeed article in Backup Portal from XXX)
- The affected account has been terminated. As soon as a cancellation is carried out via the center, we block the data of the affected account. This will be removed from the vault system after 14 days of termination.
- The affected account / computer / job is currently being migrated. The migration process blocks the data at source and destination.
- The Vault detected an anomaly related to the affected job. Once an anomaly is noticed, the Vault locks the affected dataset so that an inspection can be carried out.
Recommendation for action:
Please check the above first. Points. If an update is required, you should carry it out as quickly as possible. The backup should then be possible again no later than 1 hour after the update.
If the agent in question has the current version, the backup account has not been canceled and the data has not been migrated (migrations are generally only carried out after contacting our support), there is most likely an anomaly. In this case, we recommend contacting TERRA CLOUD support.
When contacting us, please provide the order number or the name of the vault account as well as the log file from the last backup.
Backup does not start despite configured alternative backup triggers
Error image:
A file called "GlobalStatus.json" is stored in the agent directory of the system to be backed up and it states when the last backup was carried out.

The schedule can be used to set how many hours must have passed since the last backup before the next backup is started.
This JSON file is used as a data source.
Recommendation for action:
In this case, renaming or deleting the "GlobalStatus.json" file would help.
After a new backup is triggered via the alternative trigger, this file is created again and no longer takes the previous trigger into account.
Windows Agent Installation
This installation package is based on the Prozessortyp without its contents
Error image:
When installing the agent you receive the following error:
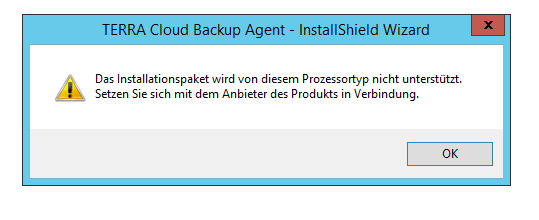
Cause:
The setup executed is not compatible with the processor type used (64 bit or 32 bit).
Solution:
Please use the appropriate setup for the type of processor used.
Pending reboot
Error image:
When installing the agent, you receive the following message:
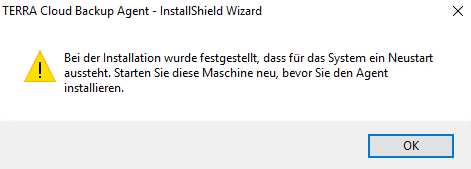 Cause:
One or more registry keys in the operating system have a pending restart noted.
Before installation, the Windows agent checks various registry entries for a stored value or existence of the key.
Recommendation for action:
Please restart the system, for example to completely complete the installation of Windows Updates.
If the error continues to appear even after several restarts, we recommend that you check the following list of registry keys:
https://adamtheautomator.com/pending-reboot-registry/
Please note that adjustments to the registry should only be made after a successful backup (e.g. through an export)!
Backup Host Agent Error 0x800706d9
Error image:
When registering the system, you receive the following error message in the Backup Portal
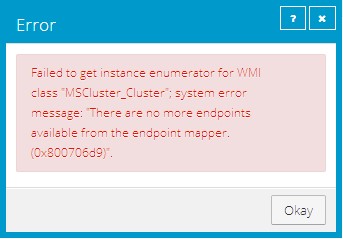 Solution:
Please check whether it is a cluster node with the failover cluster role installed and not a cluster system.
- If the system is not part of a cluster, please uninstall the Failover Cluster Role
The agent checks:
- If no Failover Cluster role is installed => Connect to Hyper-V
- If Failover Cluster Role is installed => Connect to the cluster instance
No connection between agent and portal
Error:
When installing the agent on a target system, the agent cannot authenticate itself to the portal.
Causes:
- The login details you entered are incorrect.
- Communication is not possible due to blocked ports (8086 TCP and 8087 TCP).
- A strict firewall configuration (IPS, Proxy or TLS) blocks the connection.
Port Check:
Please run the following PowerShell commands on the system where Agent is to be installed:
1 .. 28 | ForEach-Object { Write-Host "amp$(($_).ToString("00")).terracloud.de" : $(Test-NetConnection "amp$(($_).ToString("00")) .terracloud.de" -Port 8087).TcpTestSucceeded }
Test-NetConnection backup.terracloud.de -Port 8086
The "TcpTestSucceeded" option must result in "True", otherwise the port is blocked.
DNS Resolution:
Please check whether the DNS name backup.terracloud.de is resolved to the public IP 185.35.12.130.
Access data:
Please check the access data; these were defined by you within the backup portal.
If the connection attempts fail, please enable the corresponding ports.
Strict Firewall:
A strict firewall configuration (IPS, Proxy or TLS) can also ensure that the connection remains intact despite the above. Preparations are not possible. Here you should always make sure that communication between the agent and the portal can take place undisturbed.
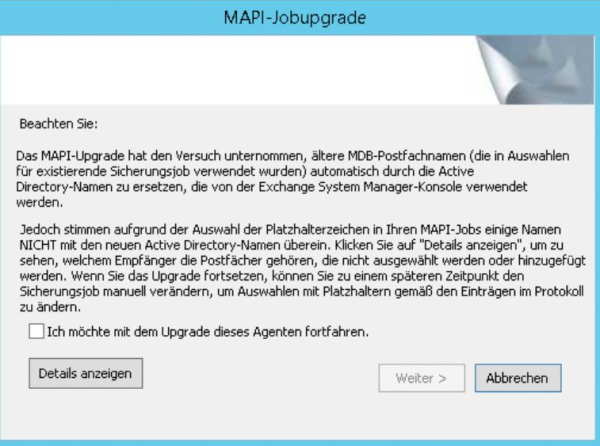
Agent Upgrade Utility stopped working / MAPI job upgrade
Error image:
The agent setup hangs and a window appears saying “Agent Upgrade Utility has stopped working”.
As soon as you click on “Close program”, a MAPI job upgrade window opens.
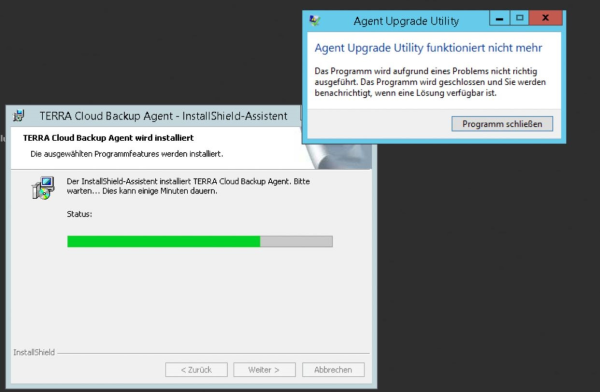
Solution:
Please run the setup again and stop at the first step.
Then download the following .zip file:
Hotfix
Since ".dll" files are recognized as viruses by default in the browser, you must unzip the files and then rename them.
libeay32.dll.txt -> libeay32.dll
ssleay32.dll.txt -> ssleay32.dll
- Now change to the Temp directory of the affected system:
- Open Explorer -> enter %temp% in the address bar.
- There should be a folder called {BD4F2616-B17D-4982-815F-0C78C476839F}.
- Please now move the two ".dll" files into the directory.
The update should then be possible via the process that has already started.
Error 1920 while installing/updating the agent
Error image:
During an installation/update of the Windows agent you will encounter the following message:

Cause:
There are two possible causes for this:
1. Required Visual C++ libraries are not available
2. The local port 2548 is blocked by another application
Known software solutions that cause problems: Dr Tax
Solution:
1. Please install the following Visual C++ cumulative update and then run the agent setup again:
https://support.microsoft.com/en-us/topic/the-latest-supported-visual-c-downloads-2647da03-1eea-4433-9aff-95f26a218cc0
2. Use the following CMD command to check whether the port is blocked by a running process:
netstat -ano | findstr 2548
Example: TCP --- 0.0.0.0:2548 --- 0.0.0.0:0 --- LISTENING --- 5036
If the running process in the task manager (details) is not called VVAgent.exe, the port is blocked.
Afterwards, you have to ensure that the port is open either temporarily or, better still, permanently. Once the port is open, the installation/update can be completed successfully.
Windows Agent uninstallation
Error 1722 while uninstalling Backup Agent
Error image:
You receive the following error message when uninstalling the Backup Agent:
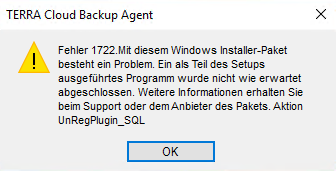
Cause:
The error occurs if information about the agent installation (plug-ins) is missing in the Global.vvc file. Each plug-in adds an entry in this configuration file (e.g. Image Plug-in).
The error occurs if, during uninstallation, the entries in this file do not match the plug-ins stored on the system.
Solution:
- If you haven't already done so, stop the TERRA Cloud backup services.
- Please rename the "Global.vvc" within the installation directory to "Global.old".
- Then uninstall the agent
Agent Scripting
PreshutdownTimeout Value
If you are using a Windows Server 2019 machine, special rights are required to change the following registry keys:
HKEY_LOCAL_MACHINE\SYSTEM\CurrentControlSet\Services\gpsvc\PreshutdownTimeout
Please make sure you can edit the group policies with the logged in user.

Please use “Advanced” to assign permissions to the respective user owners.
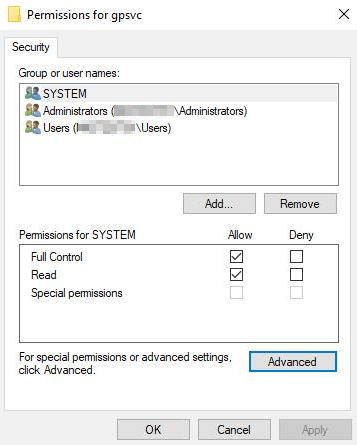
In this case, owner permissions are required.
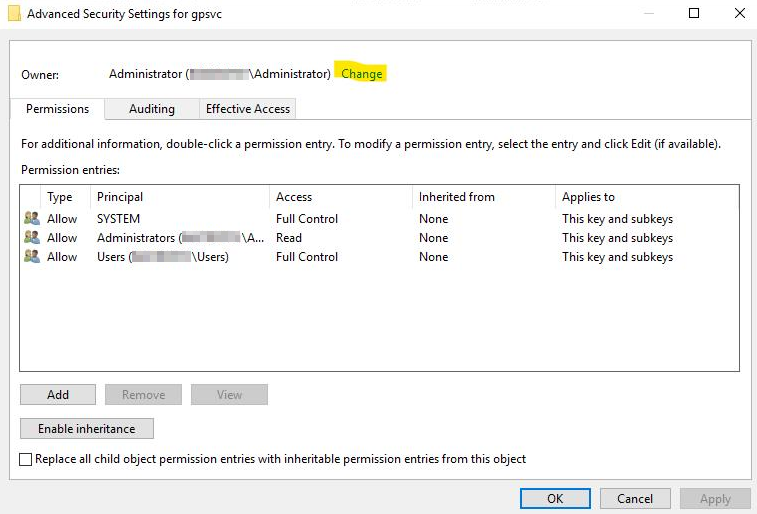
You should then be able to adjust the registry key accordingly.
Windows Agent file-based backup
Analysepunkt in folgendem Pfad wird nicht traversiert
Die Fehlermeldung besagt, dass Sie einen Pfad versuchen zu sichern der eine Art Verlinkung darstellt.
Der eigentliche Datenbestand wird sich vermutlich auf einer anderen Partition befinden.
Dieses Verzeichnis wurde offenbar nicht in die Sicherung inkludiert, der Agent sichert dies also nicht mit.
Verknüpfte Hardlinks waren nicht ausgewählt und wurden nicht gesichert
Fehlerbild:
Der Backup Job wird mit Warnungen „Verknüpfte Hardlinks waren nicht ausgewählt und wurden nicht gesichert“ abgeschlossen. Diese Warnung sieht im Logfile wie folgt aus:

Fehlerursache:
Hardlinks sind Dateien oder Verzeichnisse, die einen bestehenden Eintrag in der Master File Table referenzieren und über die identischen Eigenschaften und Inhalte, wie die Original-Datei verfügen.
Original-Datei und Hardlink unterscheiden sich nur im Pfad.
Der Konfigurierte Sicherungssatz beinhaltet nicht alle Hardlinks, die für die Original-Datei existieren und können daher nicht gesichert werden.
Lösungsmöglichkeiten:
- Sobald die gesamte NTFS Partition gesichert wird, können keine verknüpften Hardlinks mehr bemängelt werden.
- Der Sicherungssatz kann um alle bestehenden Hardlinks erweitert werden, die benötigen Pfade können über den untenstehenden Befehl über die PowerShell oder die CMD ausgelesen werden.
 Syntax : fsutil hardlink list <Dateiname>
 Beispiel : fsutil hardlink list c:\liste.txt
OneDrive Verzeichnis kann nicht gesichert werden
Fehlerbild:
Ein filebasierter Backup Job meldet folgenden Fehler im Logfile:
DISK-E-04205 Fehler beim Suchen nach Datei C:\Users\%USER%\OneDrive\*.*
DISK-E-04101 Betriebssystemmeldung: Das Medium ist schreibgeschützt.
Lösung:
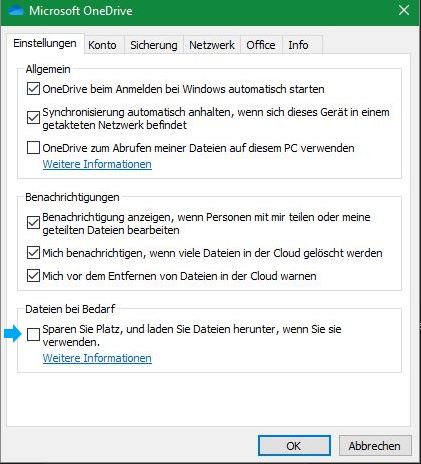
Eine Einstellung innerhalb von OneDrive sorgt dafür, dass der Agent nur Verknüpfungen zu Dateien sieht, da diese erst bei Bedarf heruntergeladen werden.
Diese 0KB Dateien sorgen für die o. g. Fehlermeldung. Sobald Sie die Dateien auf Ihr System heruntergeladen haben, verschwinden die Fehlermeldungen.
Das entfernen des Hakens in der "Dateien bei Bedarf" Checkbox würde ebenfalls für die gewünschte Lösung sorgen:
SV -W-08372 Ausschluss <Exklusion im Backup Job> wird unterdrückt, da er die <Bestandteil der BMR-Sicherung> BMR-Auswahl beeinträchtigt
Fehlerbild:
Sie erhalten im Logfile eines dateibasierten Backup Jobs folgende Fehlermeldung:
SV -W-08372 Ausschluss <Exklusion im Backup Job> wird unterdrückt, da er die <Bestandteil der BMR-Sicherung> BMR-Auswahl beeinträchtigt.
Ursache:
Die konfigurierte Exklusion würde Dateien ausschließen, die für die BMR-Sicherung notwendig sind.
Der Backup Agent ignoriert die Exklusion um eine BMR-Sicherung durchzuführen.
Handlungsempfehlung:
Bitte entfernen Sie die bemängelte Exklusion aus dem betroffenen Backup Job, da der Job andernfalls bei jeder Sicherung mit einer Warnung abschließt.
Wandeln Sie die Exklusion, falls diese benötigt wird, dahingehend ab, dass keine systemrelevanten Dateien ausgeschlossen werden.
Outlook-Offlinedatendatei (OST)
Bei *.ost-Dateien handelt es sich um Offline-Outlookdatendateien, welche automatisch von IMAP-Konten, Microsoft 365-Konten, Exchange-Konten und Outlook.com-Konten erstellt werden.
Da diese nicht von einem Computer auf einen anderen verschoben werden können, entfällt die Notwendigkeit einer Sicherung.
Folgender Registry Key schließt standardmäßig *.ost-Dateien aus der Erstellung eines VSS Snapshots aus:
Computer\HKEY_LOCAL_MACHINE\SYSTEM\CurrentControlSet\Control\BackupRestore\FilesNotToSnapshot
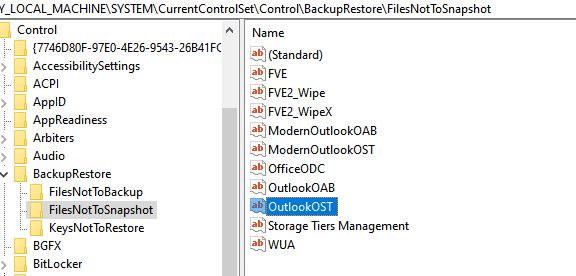
Warum sollten *.ost-Dateien aus der Sicherung ausgeschlossen werden?:
https://social.technet.microsoft.com/Forums/en-US/fc9bebff-9494-4b45-b43d-6b2f8e98add4/oops-windows-7-backup-omits-key-outlook-mail-files
https://support.office.com/en-us/article/find-and-transfer-outlook-data-files-from-one-computer-to-another
Weitere Informationen zu Dateien, die durch das Betriebsystem automatisch aus einer Sicherung exkludiert werden:
https://docs.microsoft.com/en-us/windows/win32/vss/excluding-files-from-shadow-copies
Es wird nicht empfohlen Änderungen an den erwähnten Registry Keys vorzunehmen.
DISK-E-08235 Betriebssystemfehler 1392, Meldung: Die Datei oder das Verzeichnis ist beschädigt und nicht lesbar
Fehlerbild:
Sie erhalten im Logfile folgende Fehlermeldung:
DISK-E-08235 Betriebssystemfehler 1392, Meldung: Die Datei oder das Verzeichnis ist beschädigt und nicht lesbar
Ursache:
Der Backup Agent gibt eine Fehlermeldung des Betriebsystems weiter, dass die bemängelte Datei beschädigt oder nicht lesbar ist.
Handlungsempfehlung:
Bitte prüfen Sie die entsprechende Datei, da diese Fehlermeldung nicht von der Backup Software verursacht wird.
Ein Systemscan via sfc/scannow kann das Fehlerbild ggf. beheben.
Auch eine Diagnose über CHKDSK kann in diesem Fall hilfreich sein.
Sicherheitsdatenverarbeitung aufgrund unzureichender Berechtigung deaktivieren
Dieser Artikel wurde für den Job Typen "Lokales System" verfasst. Für den Job Typ "UNC-Dateien" gibt es folgenden Artikel
Fehlerbild:
Sie erhalten im Logfile folgende Warnmeldung:
DISK-W-08623 Sicherheitsdatenverarbeitung aufgrund unzureichender Berechtigung deaktivieren
Ursache:
Compress Advanced Attribute (Inhalt komprimieren, um Speicherplatz zu sparen) für mindestens ein Verzeichnis aktiviert.
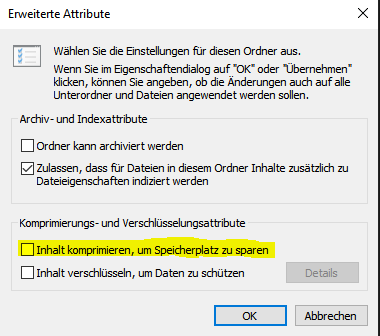
Lösung:
Um diese Verzeichnisse zu lokalisieren können Sie den Job einmal mit einem anderem Log-Level ausführen.
Bitte bearbeiten Sie hierzu Ihren Job und wählen als „Optionen für Protokolldatei:" die Option „Verzeichnis" aus. Führen Sie im Anschluss das Backup erneut aus, nun sollten Sie unterhalb der unten aufgezeigten Zeile Hinweise auf die Verzeichnisse finden die diese verursachen.
Diese Form der Protokollierung große Logfiles erzeugen daher sollte dieser Typ nur temporär genutzt werden.
Lokalisieren Sie diese Ordner und entfernen Sie in den Eigenschaften->Erweitert den Punkt „Inhalt komprimieren, um Speicherplatz zu sparen".
Anschließend sollten die beiden TERRA CLOUD Backup Dienste neugestartet werden.
DISK-E-04144 Fehler beim Öffnen von Datei [...] $Exported$BCD für Eingabe
Fehlerbild:
Sie erhalten im Logfile folgende Warnmeldung:
DISK-E-04144 Fehler beim Öffnen von Datei \\?\GLOBALROOT\Device\HarddiskVolume2\EFI\Microsoft\Boot\$Exported$BCD für Eingabe
DISK-E-08235 Betriebssystemfehler 32, Meldung: Der Prozess kann nicht auf die Datei zugreifen, da sie von einem anderen Prozess verwendet wird
DISK-E-04144 Fehler beim Öffnen von Datei \\?\GLOBALROOT\Device\HarddiskVolume2\EFI\Microsoft\Boot\$Exported$BCD.LOG für Eingabe
DISK-E-08235 Betriebssystemfehler 32, Meldung: Der Prozess kann nicht auf die Datei zugreifen, da sie von einem anderen Prozess verwendet wird
Ursache:
Dieses Fehlerbild wird von verschiedener Antivirensoftware verursacht die auf Bitdefender basieren. Verantwortlich ist das Modul "Verhaltensscan" in der Version 6.6.18.265.
Lösung:
Bitte führen Sie ein Update der Antivirensoftware durch, da dieses Fehlerbild in einem Update behoben wurde.
UTIL-E-04101 O/S message: Die Anforderung konnte wegen eines E/A-Gerätefehlers nicht ausgeführt werden
Fehlerbild:
Sie erhalten im Logfile folgende Warnmeldung:
UTIL-E-04101 O/S message: Die Anforderung konnte wegen eines E/A-Ger tefehlers nicht ausgeführt werden
Ursache:
Der Backup Agent gibt diese Fehlermeldung des Betriebsystems im Logfile weiter.
Sie finden diese Fehlermeldung auch in den System Eventlogs unter der ID 153 wieder.
Es handelt sich dabei nicht um ein Problem mit der Backup Lösung.
Handlungsempfehlung:
Bitte prüfen Sie folgenden Microsoft Beitrag zu dieser ID.
Wie in dem Microsoft Beitrag beschrieben, handelt es sich um einen Timeout einer Anfrage an den Storage.
Zum weiteren Fehlerdiagnose empfehlen wir das CHDSK Tool, weitere Informationen dazu finden Sie unter:
Microsoft Beitrag chdsk
ENVC-E-04096 GetProcessorInfo FindFirstObject failed
Fehlerbild:
Sie erhalten im Logfile eines dateibasierten Backup Jobs folgende Fehlermeldung:
ENVC-E-04096 GetProcessorInfo FindFirstObject failed
ENVC-E-04096 GetBootConfiguration FindFirstObject failed
ENVC-E-04096 GetComputerSystem FindFirstObject failed
ENVC-E-04096 GetOSInfo FindFirstObject failed
ENVC-E-04096 CaptureSystemRestorePointInfo Env Exception: Failed to obtain EnvInfo
BMR -E-08382 BMRCaptureEnvInfo.dll konnte nicht initialisiert werden: BMR::CaptureEnvInfoDLL::captureSystemRestorePointInfo(): BMRCaptureEnvInfo.dll DLL failed to Capture System Restore Point Info
Ursache:
Der Backup Agent kann keine Informationen des Systems (z.B. Version des Betriebsystems) über die WMI Schnittstelle abrufen. Dieses Fehlerbild wird nicht durch den TERRA CLOUD Backup Agenten verursacht.
Es kann sein, dass die benötigten Dateien sich noch im Zugriff durch andere Programme befinden und daher die Informationen nicht ausgelesen werden können.
Handlungsempfehlung:
Bitte prüfen Sie exemplarisch die folgende Abfrage über die PowerShell:
Get-WmiObject Win32_Processor
Sollte auch hier keine Ausgabe möglich sein, empfehlen wir Ihnen die Windows Event Logs zu diesem Zeitpunkt zu prüfen.
DISK-W-08197 Datei kann nicht auf Hardlinks geprüft werden: \\?\GLOBALROOT\Device\HarddiskVolumeShadowCopyXY\DateiXY (OS error (0x5): Zugriff verweigert
Fehlerbild:
Sie erhalten im Logfile eines dateibasierten Backup Jobs folgende Fehlermeldung:
DISK-W-08197 Datei kann nicht auf Hardlinks geprüft werden: \\?\GLOBALROOT\Device\HarddiskVolumeShadowCopyXY\DateiXY (OS error (0x5): Zugriff verweigert )
DISK-E-04144 Fehler beim Öffnen von Datei \\?\GLOBALROOT\Device\HarddiskVolumeShadowCopyXY\DateiXY für Eingabe
Ursache:
Der Backup Agent ist nicht in der Lage, die betroffene Datei zu sichern.
Handlungsempfehlung:
Der in der Fehlermeldung genannte Pfad (\\?\GLOBALROOT\Device\HarddiskVolumeShadowCopyXY\) kann ganz normal auf ein vorhandenes Volume aufgelöst werden.
Bitte überprüfen Sie, warum der Zugriff nicht möglich ist. Meist befinden sich die Dateien im Zugriff einer weiteren vorhandenen Anwendung.
Generell muss sichergestellt werden, dass der Agent Zugriff auf die betroffene Datei erhält.
Der Wechsel auf eine imagebasierte Sicherung wäre ebenfalls eine Möglichkeit, die Problematik permanent zu lösen.
DISK-E-08235 Betriebssystemfehler 225, Meldung: Der Vorgang konnte nicht erfolgreich abgeschlossen werden, da die Datei einen Virus oder möglicherweise unerwünschte Software enthält
Fehlerbild:
DISK-E-04144 Fehler beim öffnen von Datei XYZ für Eingabe
DISK-E-08235 Betriebssystemfehler 225, Meldung: Der Vorgang konnte nicht erfolgreich abgeschlossen werden, da die Datei einen Virus oder möglicherweise unerwünschte Software enthält
Ursache:
Dieses Fehlerbild wird nicht durch die TERRA CLOUD Backup Lösung verursacht. Der Windows Agent gibt eine Meldung des Betriebssystems über die Logdatei der Sicherung weiter.
Die Meldung stammt dabei von den MS Security Essentials bzw. dem Windows Defender.
Handlungsempfehlung:
- Bitte führen Sie einen vollständigen Antivirenscan des Systems durch
- Prüfen Sie die Windows Eventlogs und die Logdateien der verwendeten Antivirenlösung
- Sollten die Datei/Dateien auf dem System verbleiben, exkludieren Sie diese aus dem Sicherungsjob
- Ändern Sie die Einstellung für die Option "Behebung von Fehlern beim Lesen von Daten" auf "Fehler protokollieren und Sicherung fortsetzen"
Windows Agent UNC Backup
DISK-W-04449 - Fehler letzte Zugriffszeit konnte nicht zurückgesetzt werden
Fehlerbild:
Sie erhalten in einem UNC-Job im Logfile folgenden Fehler:
DISK-W-04449 Letzte Zugriffszeit für DATEIPFAD kann nicht zurückgesetzt werden
Ursache:
Der Agent prüft bei einem filebasierten Backup die letzte Zugriffszeit und merkt sich diese, danach wird die Datei gelesen und gesichert.
Durch die Sicherung wird die letzte Zugriffszeit verändert und der Agent versucht diese auf die ursprüngliche Zugriffszeit zu ändern.
Manche NAS Systeme erlauben das Zurücksetzen der Zugriffszeit nicht und somit entsteht das Fehlerbild.
Lösung:
1. Bearbeiten Sie die job.vvc im Installationsverzeichnis des Agenten
2. Fügen Sie diese Zeile zur Backup{ } section hinzu: Last_Access_Time_Fix = False
DISK-W-08623 - Sicherheitsdatenverarbeitung aufgrund unzureichender Berechtigung deaktivieren
Dieser Artikel wurde für den Job Typen "UNC-Dateien" verfasst. Für den Job Typ "Lokales System" gibt es folgenden Artikel
Fehlerbild:
Sie erhalten im Logfile eines UNC Jobs folgende Warnmeldung:
DISK-W-08623 Sicherheitsdatenverarbeitung aufgrund unzureichender Berechtigung deaktivieren
Ursache:
Das NAS erlaubt die Sicherung der ACLs nicht.
Handlungsempfehlung:
Bitte gehen Sie auf das Agentensystem und öffnen die Jobkonfiguration:
C:\Program Files\TERRA Cloud Backup\Agent\<JOBNAME>.vvc"
Hier finden Sie die Einträge Ignore_Security und Ignore_AltData:
Ignore_Security: Dieser Schalter legt fest, ob die ACLs gesichert werden sollen oder nicht. Das NAS (z.B. QNAP) erlaubt die Sicherung der ACLs nicht, sodass Sie den Schalter auf TRUE setzen müssen.
Ignore_AltData: Dieser Schalter legt fest, ob die erweiterten Attribute gesichert werden sollen oder nicht.
Sofern die Option Ignore_Security auf TRUE gesetzt wurde, oder MAC-Dateien über den Job gesichert werden, müssen Sie den Schalter ebenfalls auf TRUE setzen.
Anschließend sollten die beiden TERRA Cloud Backup Dienste neugestartet werden.
Bitte stellen Sie ebenfalls sicher, dass das Agentenverzeichnis (C:\Program Files\TERRA Cloud Backup\Agent\*) als Ausnahme im vorhandenen Antivirenprogramm konfiguriert wird. Andernfalls kann es nach der Konfiguration der o. g. Parameter zu Problemen bei der Sicherung kommen.
Nachdem Sie die Optionen gesetzt haben und eine Sicherung erfolgt ist, sollten Sie auf jeden Fall eine Testrücksicherung durchführen.
Da die Sicherung von MAC-Dateien nicht offiziell von unserer Lösung unterstützt wird, können wir nicht zu 100 % garantieren, dass die Dateien ohne Probleme wiederherstellt werden können.
Windows Agent Image Backup
CBT (Changed Block Tracking) deaktivieren
Anleitung:
- Beenden Sie die beiden Dienste des TERRA CLOUD Backup Agenten
- Bitte navigieren Sie in das Installationsverzeichnis des TERRA CLOUD Backup Agenten (Standardinstallationspfad:"C:\Program Files\TERRA Cloud Backup\Agent")
- Öffnen Sie die Datei NamedesBackupJobs.vvc
- Fügen Sie einen neuen Schalter wie unten beschrieben hinzu
- Speichern Sie die Datei inklusive der Änderungen
- Starten Sie die beiden Dienste des TERRA CLOUD Backup Agenten
Schritt 7:
Suchen Sie nach dem folgenden Abschnitt in der geöffneten Konfigurationsdatei:
VolumeImageBackup {

SQLServer_Awareness = False

}
Fügen Sie den folgenen Schalter hinzu:
VolumeImageBackup {

SQLServer_Awareness = False

EnableCBT = False

}
Auswirkungen dieser Anpassung:
Durch diese Konfigurationsanpassung wird die Deltaermittlung über die Changed Block Tracking Technologie ausgeschaltet.
Sie erhalten im Logfile eine Warnung bezüglich der Anpassung:
VIMG-W-09854 CBT (Changed Block Tracking) ist in der Konfigurationsdatei deaktiviert. Zur Sicherung wird das gesamte Volume gelesen.
Durch den vollständigen Leseprozess des Volumes verlängert sich die Sicherungszeit.
VIMG-W-09841 - CBT (Changed Block Tracking) ist nicht verfügbar
Fehlermeldung:
Sie erhalten im Logfile folgende Warnmeldung:
VIMG-W-09841 CBT (Changed Block Tracking) ist nicht verfügbar.
Ursache:
Die Installation des CBT-Treibers (Changed Block Tracking) benötigt einen Neustart, dieser wurde zum Zeitpunkt des Backups noch nicht durchgeführt.
Hinweis:
Die Sicherung eines Systems über einen Image Backup Job ist auch ohne das Changed Block Tracking möglich, jedoch ist die Sicherungsdauer wesentlich länger.
Lösung:
Bitte führen Sie einen Systemneustart durch um den vollen Funktionsumfang des Image Plug-ins nutzen zu können.
VIMG-W-09829 - Der Treiber für die Protokollierung geänderter Blöcke kann die Änderungen für Volume <X>:<Volume{XY}> nicht protokollieren. (Zustand 0, Status 0)
Fehlermeldung:
Sie erhalten im Logfile folgende Warnmeldung:
VIMG-W-09829 Der Treiber für die Protokollierung geänderter Blöcke kann die Änderungen für Volume <X>:<Volume{XY}> nicht protokollieren. (Zustand 0, Status 0)
Ursache:
Die Installation des CBT-Treibers (Changed Block Tracking) benötigt einen Neustart, dieser wurde zum Zeitpunkt des Backups noch nicht durchgeführt.
Hinweis:
Die Sicherung eines Systems über einen Image Backup Job ist auch ohne das Change Block Tracking möglich, jedoch ist die Sicherungsdauer wesentlich länger.
Lösung:
Bitte führen Sie einen Systemneustart durch um den vollen Funktionsumfang des Image Plug-ins nutzen zu können.
PLGN-E-05905 Konnte <VolumeImagePlugin.dll> nicht laden
Fehlermeldung:
Sie erhalten im Logfile folgende Fehlermeldung.
PLGN-E-05905 Konnte <VolumeImagePlugin.dll> nicht laden
DISK-E-04793 Laufwerk $VOLUMEIMAGE$:\ wird nicht als persistentes zugeordnetes Laufwerk erkannt (Laufwerk nicht gefunden).
DISK-E-04204 Fehler beim Zuweisen von Kanal zu $VOLUMEIMAGE$:\*.*
Ursache:
Die Backuplösung ist nicht in der Lage, das Image-Plugin zu verwenden. Oftmals aufgrund folgender Ursachen:
- Das Image-Plugin wurde nach einer Neuinstallation / Erneuten Registrierung vergessen zu installieren.
- Das Image-Plugin / der Agent ist beschädigt.
Lösung:
Durch ein erneutes Ausführen des Agentensetups, haben Sie die Möglichkeit, eine Änderungsinstallation durchzuführen. Hier können Sie das Image-Plugin nachinstallieren.
Bitte beachten Sie, dass ein Neustart nach der Installation des Image-Plugins erfolgen sollte.
Durch ein erneutes Ausführen des Agentensetups haben Sie ebenfalls die Möglichkeit, eine Reparaturinstalltion des Agenten durchzuführen.
VIMG-E-0449 Volumeimage_plugin::VolumeImageBackupAdapter::getNextBackupObject fehlgeschlagen
Fehlermeldung:
01.ago. 07:18:47 VIMG-E-07966 Job kann nicht fortgesetzt werden.
01.ago. 07:18:59 VIMG-E-04495 volumeimage_plugin::VolumeImageBackupAdapter::getNextBackupObject fehlgeschlagen.
01.ago. 07:18:59 BSTR-E-04144 Fehler beim Öffnen von Datei C:\Program Files\TERRA Cloud Backup\Agent\*
01.ago. 07:18:59 BKUP-E-04706 Job wird zum Fehlschlagen gezwungen. [VV]
01.ago. 07:18:59 BKUP-F-04110 Job konnte nicht abgeschlossen werden. [VV]
Ursache:
Der Microsoft VSS Dienst kann das System nicht in einen konsistenten Zustand versetzen.
Es gibt viele mögliche Ursachen z.B.:
- Auf dem zu sichernden System ist der "Microsoft Hyper-V VSS Writer" hinterlegt, bitte beachten Sie, dass eine BMR Sicherung auf Hyper-V Hosts nicht unterstützt wird
- VSS Writer einer Drittanbietersoftware sind auf dem System hinterlegt und sorgen für Probleme (meist Inkompatibilität)
- Ein auf dem System vorhandener Dienst verweist auf eine Netzwerkfreigabe, bitte beachten Sie, dass die VSS Komponente nicht auf Netzwerkfreigaben zugreifen kann
Handlungsempfelung:
Bitte prüfen Sie die hinterlegten VSS Writer über den Befehl "vssadmin list Writers" und vergleichen Sie diese mit einem System, auf dem eine imagebasierte BMR Sicherung möglich ist.
Zur Überprüfung der Dienste (Punkt 3) kann folgender Beitrag verwendet werden:
Eine Netzwerkfreigabe sorgt dafür, dass ein BMR Job fehlschlägt
VIMG-E-10681 Volume<Volume{GUID}> hat einen nicht unterstützten Partitionstyp
Fehlerbild:
Sie erhalten im Logfile die folgende Fehlermeldung:
VIMG-E-10681 Volume<Volume{GUID}> hat einen nicht unterst??tzten Partitionstyp
Ursache:
Dieser Fehler tritt nach der Aktualisierung des Agenten auf die Version 8.90 oder höher auf.
Ab der Agentenversion 8.90 muss die Windows Recovery Partition nicht mehr gesichert werden, da diese bei der Wiederherstellung rekonstruiert werden kann.
In der Jobkonfiguration wurde das Volume(<Volume{GUID}>) gesondert in den Sicherungssatz übernommen (neben z.B. BMR oder gesamter Server).
Der aktualisierte Agent kann diese Jobkonfiguration nicht vollständig abarbeiten, daher gibt der Agent eine Fehlermeldung.
Die Qualität des Backups wird durch dieses Fehlerbild nicht gemindert, sofern keine sonstigen Fehler oder Warnung im Logfile dokumentiert sind.
Lösung:
Bitte entfernen Sie das Volume (<Volume{GUID}>) aus dem Sicherungssatz.
Fehler beim Erfassen der Informationen zum Systembereitstellungspunkt
Fehlerbild:
Sie erhalten im Logfile folgendes oder ähnliches Fehlerbild:
BKUP-E-08235 Betriebssystemfehler 2, Meldung: Das System kann die angegebene Datei nicht finden
BKUP-W-08732 Einhängepunkt-Informationen für System konnten nicht erfasst werden. [VV]
BKUP-E-09401 An error occurred while collecting system mount point information. [VV]
BKUP-E-08235 O/S error 2, message: Das System kann die angegebene Datei nicht finden
BKUP-W-08732 Failed to collect system mount point information [VV]
Handlungsempfehlung:
Bitte führen Sie folgenden Befehl auf dem betroffenen System aus:
Mountvol /r
(Entfernt Volume Mount-Point-Verzeichnisse und Registrierungseinstellungen für Volumes, die sich nicht mehr im System befinden und verhindert so, dass sie automatisch gemountet werden und ihre früheren Volume Mount-Punkte erhalten, wenn sie dem System wieder hinzugefügt werden.)
Ein Neustart des Systems kann ebenfalls hilfreich sein.
ENVC-E-04096 Failed to find System volume '\Device\HarddiskVolumeXY'. This sometimes happens if disk has been recently converted to Dynamic and Windows was not yet rebooted
Fehlerbild:
ENVC-E-04096 Failed to find System volume '\Device\HarddiskVolumeXY'. This sometimes happens if disk has been recently converted to Dynamic and Windows was not yet rebooted
Ursache:
Ein auf dem System vorhandenes Volume befindet sich im RAW Zustand, sodass keine Sicherung möglich ist. Über Diskpart lässt sich dies wie folgt überprüfen:
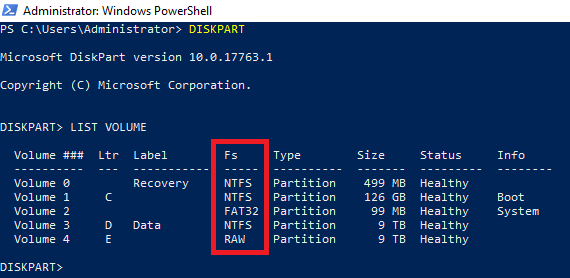
Handlungsempfehlung:
Über CHKDSK lässt sich das Problem lösen:
CHKDSK /f /r
Oftmals benötigt dieser Befehl einen Systemneustart. Dieser sollte auf jeden Fall erst ausgeführt werden, sobald alle wichtigen Anwendungen gestoppt wurden. Für Informationen zu den o.g. Parametern können Sie "chkdsk /?" ausführen.
VIMG-E-08821 Internal error in volumeimage_plugin::BlockBitmap::ConvertToBitmapIndexAndLength
Fehlerbild:
Sie erhalten im Logfile die folgende Fehlermeldung:
VIMG-E-08821 Internal error in volumeimage_plugin::BlockBitmap::ConvertToBitmapIndexAndLength
Ursache:
Dieses Fehlerbild tritt auf, sofern Agenten Version 9.20/9.21 verwendet wird und folgende Option auf einem vorhandenen Volume aktiviert wurde:
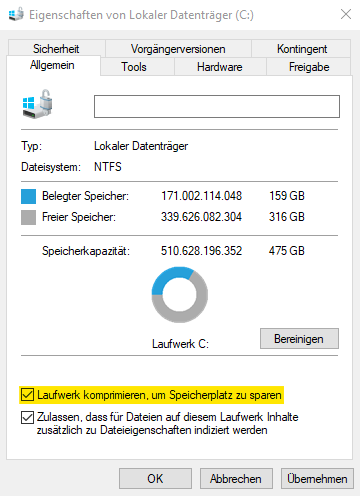
Handlungsempfehlung:
Unser Softwarehersteller wurde bereits über diese Problematik informiert und arbeitet aktuell an einer permanenten Lösung. In der Zwischenzeit bleibt leider nur der Workaround, die betroffene Option zu deaktivieren.
Windows Agent SQL Backup
SQL Express DB-Sicherung per SQL-Plugin schlägt fehl
Fehlerbild:
06.ago. 14:08:25 DISK-E-04144 Fehler beim Öffnen von Datei \\?\GLOBALROOT\Device\HarddiskVolumeShadowCopy217\Programme\Microsoft SQL Server\MSSQL10_50._SQLEXPRESS\MSSQL\DATA\SQLEXPRESS\%DB%.mdf für Eingabe
06.ago. 14:08:25 VSS -E-08102 Fehler beim Sichern von Datei (reason: stream backup error) C:\Programme\Microsoft SQL Server\MSSQL10_50._SQLEXPRESS\MSSQL\DATA\SQLEXPRESS\%DB%.mdf Komponente <writer SqlServerWriter (SQL Server 2008 R2:SQLWriter), component %SERVERNAME%\ SQLEXPRESS\ SQLEXPRESS> schlägt fehl.
06.ago. 14:08:25 CTLG-W-09909 Unvollständige Sicherungssatz-Metadaten. Informationen für "plugin-specific" konnten nicht abgerufen werden
Ursache:
SQL Express Instanzen können mit dem SQL Plug-in erst ab der Agentenversion 8.71 gesichert werden. Eine Übersicht der Unterstützten SQL Versionen finden Sie in den Release Notes.
Documentation and Release Notes
Lösung:
Bitte aktualisieren Sie die Agentenversion auf 8.71 oder höher.
SQ12-E-09295 Von der Datenbank XY wurde noch keine erfolgreiche vollständige Sicherung erstellt.
Fehlerbild:
Sie erhalten im Logfile die Fehlermeldung, dass von einer Datenbank keine erfolgreiche Sicherung erstellt werden konnte:
SQ12-E-09295 Von der Datenbank Datenbankname wurde noch keine erfolgreiche vollständige Sicherung erstellt.
Mögliche Ursachen:
- Der MSSQL-VSSWriter Dienst wird unter einem Systemkonto ausgeführt.
- Der MSSQL-VSSWriter Dienst ist nicht aktiv
- Der Hostname bzw. Instanzname wurde geändert
Handlungsempfehlungen:
Punkt 1 + 2:
- Der MSSQL-VSSWriter Dienst sollte auf einen ActiveDirectory-Account mit Administrator-Rechten umgestellt werden.
Punkt 3:
SQL Backup Job lässt sich nach einer Änderung der User-Credentials / des Instanznamen / Hostnamen nicht bearbeiten
Lösung:
Legen Sie vor dem Ändern der Dateien eine Sicherungskopie an!
1. Legen Sie einen neuen SQL Job mit den neuen Credentials an.
2. Sie finden im Installationsverzeichnis des Agenten die Datei „JOBNAME.vvc“
3. Kopieren Sie den Absatz „WindowsCredentials“, sofern die Windows Authentifizierung genutzt wurde, andernfalls den Absatz "SQLServer0" von Ihrem Testjob in die .vvc des richtigen Backup Jobs.
Im Anschluss sollte das Bearbeiten wieder möglich sein.
Vom Agenten konnte keine Instanzliste bereitgestellt werden
Fehlerbild:
Sie erhalten die Fehlermeldung auf dem folgenden Screenshot, wenn Sie über das Backup Portal einen neuen SQL-Backup Job anlegen möchten:
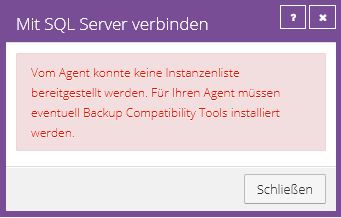
Ursache:
Der Agent kann keine Verbindung zu der SQL Instanz aufbauen.
Mögliche Ursachen dafür sind:
- Es ist keine SQL Instanz auf dem System installiert
- Die installierte SQL Instanz wird vom SQL Plug-in nicht unterstützt, da es z.B. keine Microsoft SQL Instanz ist
Handlungsempfehlung:
Bitte überprüfen Sie die aktuellen Release Notes für den Windows Agenten, ob die installierte Instanz unterstützt wird.
Ihnen werden die Datenbanken einer benannten Instanz angezeigt, obwohl Sie "Standard" als Instanz ausgewählt haben
Fehlerbild:
Bei der Einrichtung eines neuen SQL Backup Jobs, oder bei der Bearbeitung eines bestehenden Jobs, werden Ihnen nicht die Datenbanken der MSSQL Instanz angezeigt.
Zusätzlich können Sie sich ggf. nicht mit den SQL Zugangsdaten des Benutzers der MSSQL Instanz anmelden, obwohl Sie die Standard Instanz ausgewählt haben.
Ursache:
Wenn Sie im Backup Portal Standard als Instanz auswählen, wird im Hintergrund die Instanz geprüft für die der Port 1433 zugewiesen ist.
Sollte dieser Port einer anderen Instanz zugewiesen sein, wir Ihnen diese Instanz angezeigt bzw. Sie werden aufgefordert sich für diese zu authentifizieren.
Lösungsmöglichkeit 1:
Weisen Sie falls möglich der Standard Instanz wieder den Port 1433 zu.
- Öffnen Sie dazu den SQL Server Configuration Manager
- Wählen Sie den Menüpunkt SQL-Server Netzwerkkonfiguration aus -> Protokolle für MSSQLSERVER -> TCP/IP -> IPALL
- Für diese Option sollte der Port 1433 hinterlegt sein, wie auf folgendem Screenshot
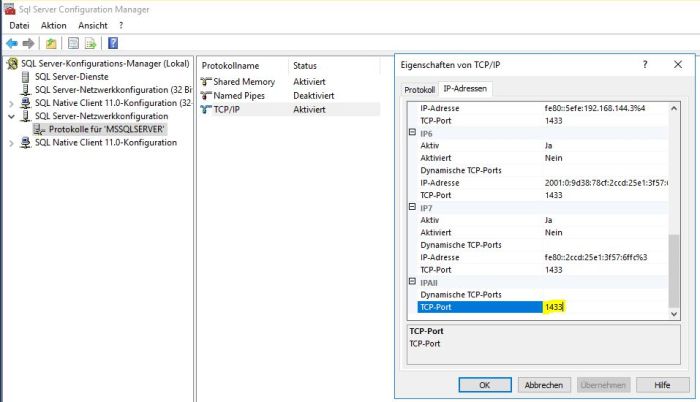
Lösungsmöglichkeit 2:
Sollte Lösungsmöglichkeit 1 nicht möglich sein, empfehlen wir Ihnen die folgenden Schritte umzusetzen:
Bitte überprüfen Sie zunächst den Connection String:
1.Öffnen Sie Notepad
2.Bitte fügen Sie die folgenden 3 Zeile der Textdatei hinzu. <hostname> steht für den Hostnamen Ihres SQL-Servers;<port_number> ist der zugewiesene Port der Standard Instanz
    set db = CreateObject("ADODB.Connection")

    db.open "Driver={SQL Server};Server=<hostname>,<port_number>;Database=;"

    MsgBox(db.Provider)
3.Speichern Sie die Textdatei als z.B. "test_db.vbs" ab.
4.Führen Sie das erstellte Skript aus
Führen Sie bitte nach der Verifizierung der Verbindung die folgende Anpassung in der Registry des SQL-Servers durch:
1.Öffnen Sie die Registry
2.Navigieren Sie zu “HKEY_LOCAL_MACHINE\SOFTWARE\EVault\InfoStage\Agent\”
3.Erstellen Sie den Eintrag "ADOConnectionStrings" als “REG MULTI SZ” hinzu
4.Fügen Sie dem erstellen Eintrag den folgenden Schlüssel zu
<hostname>="Driver={SQL Server};Server=<hostname>,<port_number>;Database=;"
Ein Beispiel wäre dafür:
"SQL01="Driver={SQL Server};Server=SQL01,1434;Database=;"
In diesem Beispiel ist SQL01 der Hostname und 1434 der zugewiesene Port.
Nach der Anpassung wird Ihnen die richtige Instanz im Backup Portal angezeigt, wenn Sie "Standard" auswählen.
Windows Agent Exchange Backup
EX10-W-08964 Datenbank Mailbox Database befindet sich nicht in verfügbarem Status: Incremental backup of database with circular logging
Fehlerbild:
Sie erhalten im Logfile eines Exchange Backup Jobs die folgende Fehlermeldung:
EX10-W-08964 Datenbank Mailbox Database befindet sich nicht in verfügbarem Status: Incremental backup of database with circular logging. Sicherung wird nicht durchgeführt.
Ursache:
Der Backup Job wurde mit dem Sicherungstyp "Inkrementell" durchgeführt und es handelt sich um eine Deltasicherung.
Der Sicherungstyp "Inkrementell" sichert bei der ersten Ausführung die gesamten Datenbanken, alle folgenden Sicherungen schützen die Transaktionsprotokolle.
Umlaufprotokollierung in Verbindung mit dem Sicherungstyp "Inkrementell" werden nicht unterstützt.
Lösungsmöglichkeiten:
1. Deaktivierung der Umlaufprotokollierung
2. Änderung des Sicherungstyps auf "Vollständig" über den Zeitplan des Exchange Backup Jobs
Anpassung Ziel-Mountpfad bei Granular Exchange Restore
Standardmäßig wird unterhalb von C:\RestoreMount gemountet. Sofern auf der Platte nicht genügend Platz ist, muss ein anderer Laufwerksbuchstabe verwendet werden.
Über den untenstehenden Registry-Key kann der Zielpfad angepasst werden.
Lösung:
Erstellen Sie den folgenden Registry Eintrag mit einer Zeichenfolge:
HKEY_LOCAL_MACHINE\SOFTWARE\EVault\Infostage\Agent\MountAlternatePath=
Es wird kein Neustart des Backup Dienstes benötigt.
Beispiel:
HKEY_LOCAL_MACHINE\SOFTWARE\EVault\Infostage\Agent\MountAlternatePath=e:\mp
Wenn e:\mp als Zeichenfolge verwendet wird, wird die Freigabe freigegeben: \\EX2007SERVER\e$\mp\GRT_00000010_2013-06-25-10-13-43
Hinweis:
Nur mit dem Granular Restore Tool 8.x oder höher möglich.
Die Validierung für Exchange-Datenbank Database-XYZ ist fehlgeschlagen, Ursache: Timed Out
Fehlerbild:
Sie erhalten in den Logfiles der Exchange Sicherung folgende Fehlermeldung:
EX10-F-10379 Die Validierung für Exchange-Datenbank Database-XYZ ist fehlgeschlagen, Ursache: Timed Out
Ursache:
Die Überprüfung der Datenbank über das ESEUTIL benötigt zu viel Zeit, dies kann auf eine starke Auslastung oder zu geringe Performance des Systems zurückgeführt werden.
Handlungsempfehlung:
Bitte setzen Sie folgende Registry Einträge, um den Timeout der Überprüfung zu erhöhen und den Ablauf der Überprüfung anzupassen (sequentiell):
HKEY_LOCAL_MACHINE\SOFTWARE\EVault\InfoStage\Agent\Ex2010SequentialValidation = 1 (DWORD)
HKEY_LOCAL_MACHINE\SOFTWARE\EVault\InfoStage\Agent\Ex2010ValidationTimeOut = 18000 (DWORD)
Starten Sie beide TERRA CLOUD Backup Dienste neu und versuchen Sie erneut eine Sicherung inklusive einer Datenbanküberprüfung zu starten.
EX10-F-10380 Die Validierung für Exchange-Transaktionsprotokolldateien in Datenbank Database-XYZ ist fehlgeschlagen, Ursache: Failed with exit code -1032
Fehlerbild:
Sie erhalten in den Logfiles der Exchange Sicherung folgende Fehlermeldung:
EX10-F-10380 Die Validierung für Exchange-Transaktionsprotokolldateien in Datenbank Database-XYZ ist fehlgeschlagen, Ursache: Failed with exit code -1032
Ursache:
Der Microsoft Exchange VSS Writer kann nicht auf die Transaktionsprotokolle zugreifen, da diese nicht im hinterlegten Pfad verfügbar sind.
Da sie z. B. von einer Antiviruslösung in Quarantäne verschoben wurden.
Handlungsempfehlung:
Bitte überprüfen Sie, ob die Transaktionsprotokolldateien im hinterlegten Pfad vorhanden sind.
Windows Agent Oracle Backup
Die Anmeldeinformationen für das Plug-in konnten aufgrund eines unerwarteten Fehlers nicht überprüft werden. Überprüfen Sie, ob die Anmeldeinformationen korrekt sind, und versuchen Sie es erneut
Das Oracle Plug-In nutzt die Verbindung zur zu der Oracle Datenbank EZCONNECT. Stellen Sie sicher, dass Ihre Konfiguration in der sqlnet.ora Datei korrekt ist.
z.B.:
# SQLNET.ORA Network Configuration File: d:\oracle\ora92\network\admin\sqlnet.ora
# Generated by Oracle configuration tools.
SQLNET.AUTHENTICATION_SERVICES= (NONE)
NAMES.DIRECTORY_PATH = (EZCONNECT,TNSNAMES)
Starten Sie Oracle listener und versuchen Sie es erneut mit einem Backup.
Hyper-V Agent
Hyper-V Installation der Visual C++ 2017 Runtime(64) fehlgeschlagen
Fehlerbild:
Sie erhalten während der Installation des Hyper-V Management Agents folgende Fehlermeldung im Setup:
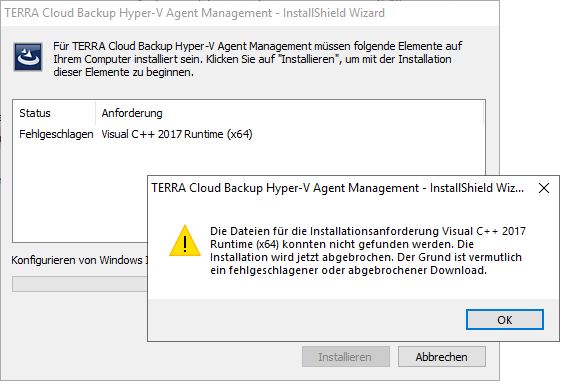
Fehlerursache:
Wie in der Fehlermeldung bereits beschrieben, gab es ein Problem mit dem Download der Runtime. Dieses Fehlerbild tritt nur sporadisch auf.
Lösung:
Sie können entweder das Setup abbrechen und die Installation inklusive dem Download der Runtime erneut durchführen oder die Runtime manuell herunterladen und installieren.
Die aktuelle Runtime können Sie unter folgendem Link herunterladen:
https://aka.ms/vs/16/release/vc_redist.x64.exe
Weitere Informationen dazu finden Sie unter:
https://support.microsoft.com/de-de/help/2977003/the-latest-supported-visual-c-downloads
Hyper-V VM wird von anderem Prozess gesichert
Fehlercode:
AGCD-E-10348 Die virtuelle Maschine "XXX" ["VM-ID"] konnte nicht gesichert werden, da sie derzeit von einem anderen Prozess gesichert wird.
Ursache:
Hierbei kann keine Sicherung der VM’s durchgeführt werden, da aufgrund eines Updates des Hyper-V Host Agenten von Version 7.x auf Version 8.60 übrig gebliebene Dateien vorhanden sind,
welche bei der Backup-Anfrage fehlinterpretiert werden.
Lösung:
Bitte wechseln Sie in folgendes Verzeichnis und entfernen alle dort befindlichen Dateien:
C:\Windows\System32\config\systemprofile\AppData\Local\EVault Software\Agent Worker\Notifications Queue\
Hinweis:
Bitte führen Sie zunächst ein Update auf die aktuellste Version des Hyper-V Agenten durch, da dieses Fehlerbild in der Version 8.84.1309 behoben wurde.
Hyper-V unbekannte Ausnahme
Fehlermeldung:
„unbekannte Ausnahme“ im Backupportal bei der Konfiguration/Einrichtung
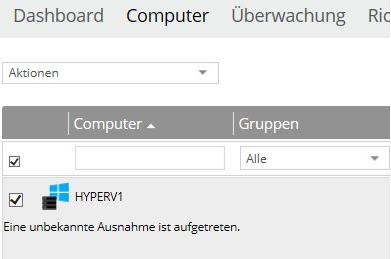
Ursache:
Hierbei kann keine Sicherung der VM’s durchgeführt werden, da aufgrund eines Updates des Hyper-V Host Agenten von Version 7.x auf Version 8.60 übrig gebliebene Dateien vorhanden sind,
welche bei der Backup-Anfrage fehlinterpretiert werden.
Lösung:
Bitte wechseln Sie in folgendes Verzeichnis und entfernen alle dort befindlichen Dateien:
C:\Windows\System32\config\systemprofile\AppData\Local\EVault Software\Agent Worker\Notifications Queue\
Hinweis:
Bitte führen Sie zunächst ein Update auf die aktuellste Version des Hyper-V Agenten durch, da dieses Fehlerbild in der Version 8.84.1309 behoben wurde.
Hyper-V Sicherung zeigt keinen Fortschritt
Fehlercode:
Eine vorher funktionierende Sicherung startet nach dem Update auf 8.60, jedoch ist kein Fortschritt ersichtlich.
Ursache:
Hierbei kann keine Sicherung der VMs durchgeführt werden, da aufgrund eines Updates des Hyper-V Host Agenten von Version 7.x auf Version 8.60 übrig gebliebene Dateien vorhanden sind,
welche bei der Backup-Anfrage fehlinterpretiert werden.
Lösung:
- Stoppen Sie die Agentendienste des MGMT Agenten und aller Host Agenten
- Bitte wechseln Sie in folgendes Verzeichnis (Schritt 3) und entfernen alle dort befindlichen Dateien:
- C:\Windows\System32\config\systemprofile\AppData\Local\EVault Software\Agent Worker\Notifications Queue\
- Bitte starten Sie die Agentendienste des MGMT und aller Host Agenten wieder.
Hinweis:
Bitte führen Sie zunächst ein Update auf die aktuellste Version des Hyper-V Agenten durch, da dieses Fehlerbild in der Version 8.84.1309 behoben wurde.
Hyper-V Sicherungen werden nicht mehr über den Zeitplan gestartet
Fehlerbild:
Der Hyper-V Agent startet keine Sicherung mehr über den Zeitplan.
Lösung:
Bitte stoppen Sie die Dienste des Agenten und warten Sie, bis der Eintrag im Portal den Status Offline erhält. Nachdem Sie die Dienste des Agenten im Anschluss wieder gestartet haben, sollte der Zeitplan wieder greifen.
Hyper-V Update von 8.60 auf 8.X schlägt fehl
Fehlermeldung:
Sie erhalten bei der Updateinstallation der Management- und Host-Komponenten der Agentenversion 8.X folgende Fehlermeldung:
Error 1316.Das angegebene Konto ist bereits vorhanden.
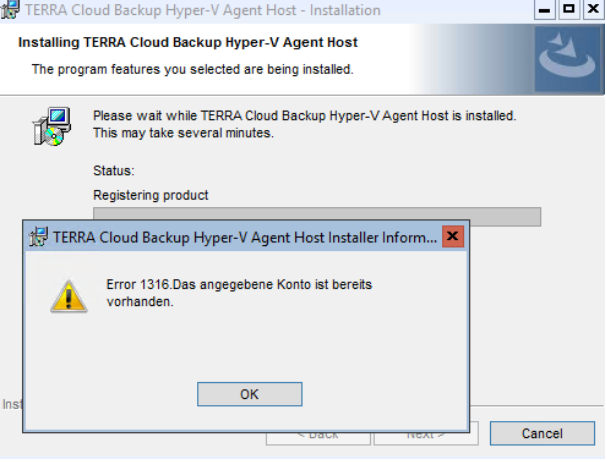
Ursache:
Jeweils ein Registry Eintrag für die MGMT- und die Host-Komponenten ist fehlerhaft und verhindert das Update von 8.60 auf 8.X.
Lösung:
- Bitte öffnen Sie auf den Systemen auf denen die einzelnen Komponenten installiert sind die Registry
- Suchen Sie nach der folgenden GUID des MGMT Agenten 27FB23FA45CDCCA419AFA539FAB44906 und klicken Sie auf den Ordner "SourceList"
- Ändern Sie der Wert des Schlüssels "PackageName" in TERRA Cloud Backup Hyper-V Agent Management.msi ab und speichern Sie diesen
- Suchen Sie in der Registry der Systeme auf denen der Host Agent installiert ist nach der GUID 2BFC6FB3019E15D449DEFDFA7BA62BA0
- Navigieren Sie in den Ordner "SourceList" und ändern Sie den Wert des Schlüssels "PackageName" in TERRA Cloud Backup Hyper-V Agent Host.msi ab und speichern Sie diesen
- Danach können Sie das Update durchführen
Hyper-V Fehler bei der Einrichtung (EVault.Shared.BamsErrorMessage: UNKNOWN_ERROR[-1])
Fehlerbild:
Sie erhalten die folgende Fehlermeldung, wenn Sie bei der Einrichtung der Management Komponente eine Verbindung zur Hyper-V Umgebung aufbauen möchten:

Ursache:
Auf dem zu sichernden Host ist das Microsoft Feature "Failover Clustering" installiert, obwohl keine Cluster eingerichtet ist.
Lösung:
Bitte deinstallieren Sie das Feature "Failover Clustering" und installieren Sie alle aktuellen erforderlichen Windows Updates.
Danach können Sie mit der Einrichtung des Management Agenten fortfahren. Ggf. ist es erforderlich den Management Agenten neu zu installieren, um die Einrichtung durchzuführen.
Hyper-V Verbindung fehlgeschlagen. Bitte überprüfen Sie die Anmeldeinformationen
Fehlerbild:
Sie erhalten die folgende Fehlermeldung, wenn Sie bei der Einrichtung der Management Komponente eine Verbindung zur Hyper-V Umgebung aufbauen möchten:
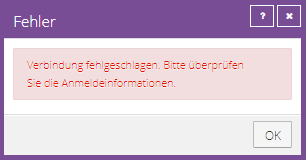
Zusätzlich erhalten Sie im Logfile des Management Dienstes (C:\Program Files\TERRA CLOUD Backup\Hyper-V Agent Management\Data\Logs\Service-AgentCoordinator.XLOG) folgenden Eintrag:
HYPV-E-09615 Anmeldung bei WMI-Namespace "root\MSCluster" auf Host "192.168.187.1" fehlgeschlagen. Systemfehlermeldung: "Zugriff verweigert (0x80070005)".
In den Windows Event Logs (System) des Hypervisors sollte zusätzlich folgender Eintrag ersichtlich sein:
Die Richtlinie für die serverseitige Authentifizierungsebene lässt nicht zu, dass der Benutzer den DCOM-Server über die Adresse 192.168.187.100 DomainXY\Administrator SID (S-1-5-21-2769728824-1306310488-2103641813-187) aktiviert. Erhöhen Sie die Aktivierungsauthentifizierungsebene mindestens auf RPC_C_AUTHN_LEVEL_PKT_INTEGRITY in der Clientanwendung.
Ursache:
Eine von Microsoft vorgenommene Härtungsmaßnahme für den vom Agenten genutzten DCOM-Service sorgt dafür, dass die Verbindung zur Hyper-V Umgebung nicht zugelassen wird.
Workaround:
Es gibt einen Workaround, welcher bis zum 14.03.2023 verwendet werden kann:
Registry-Einstellung zum Aktivieren oder Deaktivieren der Härtungsmaßnahme
Während der Übergangsphase, in welcher Sie die Härtungsmaßnahme für CVE-2021-26414 aktivieren oder deaktivieren können, kann folgender Registrierungsschlüssel verwenden werden:
Pfad : HKEY_LOCAL_MACHINE\SOFTWARE\Microsoft\Ole\AppCompat
Schlüsselname : "RequireIntegrityActivationAuthenticationLevel"
Typ : DWORD
Schlüsseldaten : default = 0x00000001 bedeutet Härtung aktiviert. 0x00000000 bedeutet Härtung deaktiviert.
Starten Sie Ihr Gerät nach dem Setzen dieses Registrierungsschlüssels neu, damit dieser wirksam wird.
Hinweis:
Unser Softwarehersteller wurde bereits über diese Problematik informiert, sodass dieser bereits an einer permanenten Lösung arbeitet.
Hyper-V Fehler bei der granularen Wiederherstellung / beim Drag and Drop von Dateien (Fehler 0x80080780)
Fehlerbild:
Sie erhalten die folgende Fehlermeldung, wenn Sie bei einer granularen Wiederherstellung einen Drag and Drop einleiten:
Fehler 0x80070780: Das System kann auf die Datei nicht zugreifen.
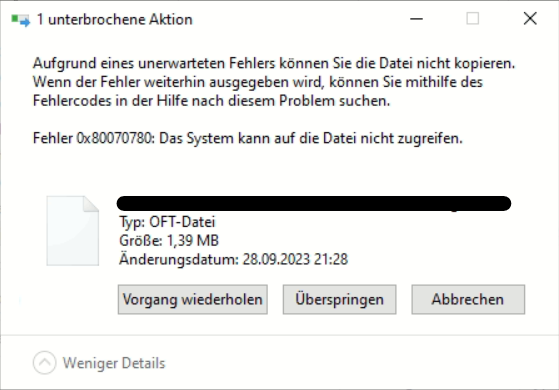 Mögliche Ursache:
Windows Server Deduplikation
Die gesicherte VM benutzt Windows Server Deduplikation, während die Rolle allerdings nicht auf dem Management System / Host installiert wurde.
Sie können z. B. per PowerShell kontrollieren, ob die Rolle auf der Quell-VM installiert wurde:
Get-WindowsFeature -Name FS-Data-Deduplication
NTFS-Berechtigungen des Quellsystems
Die NTFS-Berechtigungen des Quellsystems lassen es nicht zu, dass das Management System auf die Dateien zugreifen kann.
Oftmals handelt es sich um ein Setup, wo sich das Management System z. B. nicht in der gleichen Domäne wie die gesicherten VMs befindet, weshalb der lokale Admin keinen Zugriff auf die Dateien hat.
Lösung:
Windows Server Deduplikation
Nachdem Sie die Rolle auf dem Management System installiert haben, sollte der Zugriff auf die Dateien wieder möglich sein.
Wenn Sie zögern, die Datendeduplizierung aufgrund der erhöhten Festplatten-I/O zu aktivieren, können Sie sie nach Abschluss der Wiederherstellung wieder deaktivieren. Bei zukünftigen Wiederherstellungen muss die Datendeduplizierung jedoch wahrscheinlich wieder aktiviert werden.
NTFS-Berechtigungen des Quellsystems
Sofern möglich, können Sie die Berechtigungen auf dem Quellsystem anpassen. Diese Anpassungen wären dann ab der nächsten Sicherung im Sicherungssatz hinterlegt, sodass ab diesem Punkt wieder auf die Dateien zugegriffen werden kann.
Alternativ haben Sie noch folgende Möglichkeiten:
- Management System in die Domäne der gesicherten VMs aufnehmen bzw. sicherstellen, dass der verwendete Benutzer Zugriff auf die Dateien hat
- Wiederherstellung der kompletten VM (falls möglich VM aus dem Backup heraus starten – siehe Rapid VM Recovery Hyper-V)
Linux Agent
DISK-F-04144 Fehler beim Öffnen von Datei /var/lib/lxcfs
Fehlerbild:
Sie erhalten im Logfile eines Linux BMR Jobs die Fehlermeldung, dass Dateien unterhalb des Verzeichnisses /var/lib/lxcfs/ aufgrund fehlender Berechtigung nicht gesichert werden können.
Ursache:
Es handelt sich um ein FUSE Dateisystem für die Nutzung von Linux Containern. Innerhalb dieses Systems besitzt der root User nicht die notwendigen Berechtigungen.
Weitere Informationen zu dem Thema:
https://ubuntu.com/blog/introducing-lxcfs
https://linuxcontainers.org/lxcfs/introduction/
Handlungsempfehlung:
Da dieses Verzeichnis für eine BMR-Rücksicherung nicht notwendig ist, können Sie dieses Vezeichnis auf dem Backup Job entfernen.
Nach der Exklusion taucht die Fehlermeldung nicht mehr auf.

Delta Datei nicht gefunden / beschädigt
Fehlerbild:
Sie erhalten im Logfile folgende Fehlermeldung:
BSTR-E-04166 Datei nicht gefunden /opt/BUAgent/localjob/000000XY.DTA
BKUP-E-08194 Deltadatei fehlt. Synchronisieren Sie den Job, um die Deltadatei neu zu erstellen. [VV]
Bei einer beschädigten Delta Datei sieht das Fehlerbild sehr ähnlich aus.
Ursache:
Der Agent kann nicht auf die Delta Datei zugreifen, da sie entweder nicht vorhanden ist wie im Beispiel oben oder beschädigt ist und die hinterlegte Prüfsumme der Datei nicht mit der aktuell gemessen übereinstimmt.
Lösung:
Überprüfen Sie auf dem geschützen System im Agentenverzeichnis ob im Job Ordner .DTA und .DTX Dateien vorhanden sind, falls nicht können Sie eine Synchronistation des Jobs im Backup Portal starten.
Sollten Datei vorhanden sein, entfernen Sie diese bitte per rm DATEINAME oder z.B. per WinSCP. Bitte starten Sie danach eine Synchronisation des Jobs.
Ein zusätzlicher Prozess startet bei einer Sicherung/Wiederherstellung/Synchronisation
Fehlerbild:
Wenn ein Linux Backup Job ausgeführt wird startet ein zweiter "leerer" Prozess.
Auf diesem Screenshot sehen Sie einen "leere" Prozess der auch nach dem Abschluss von zwei anderen Prozessen noch aktiv ist.
Hinweis:
Dieses Fehlerbild wurde bereits an den Softwarehersteller weitergegeben, es handelt sich bei diesem Prozess lediglich um einen Anzeigefehler, da es auf dem entsprechenden System keinen Prozess mit der angezeigten Prozess-ID gibt.
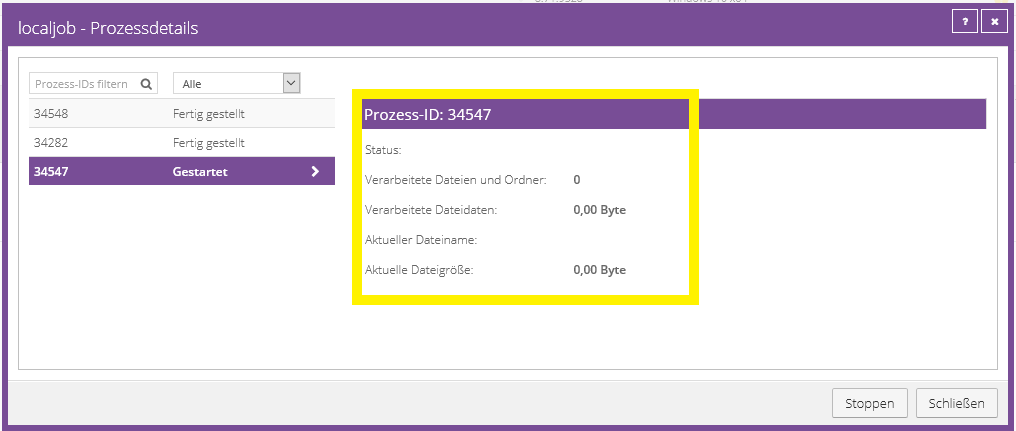
Linux System wird im Portal als "Offline" angezeigt
Fehlerbild:
Im Backup Portal wird Ihnen ein Linux Agent als "Offline" angezeigt, obwohl das gesicherte System aktiv ist und Backups weiterhin durchgeführt werden.
Ursache:
Der Dienst "VVAgent" funktioniert nicht mehr korrekt oder ist gestoppt.
Lösung:
Führen Sie auf dem betreffenden System z.B. folgenden Befehl aus um den Dienst neuzustarten:
/etc/init.d/vvagent restart
Alternativ:
systemctl restart VVAgent
BMR -E-10596 ISO-Image am angegebenen Ort nicht gefunden: /Bare_Metal_Restore_Image.iso
Fehlerbild:
Sie erhalten im Logfile eines Linux BMR-Jobs folgende Fehlermeldung:
BMR -E-10596 ISO-Image am angegebenen Ort nicht gefunden: /Bare_Metal_Restore_Image.iso
Mögliche Ursache:
- Auf dem zu sichernden System ist nicht die Relax and Recover Version 2.6 installiert (nur diese Version wird für den aktuellen Linux Agenten unterstützt)
- Das Betriebssystem bzw. die Version des Betriebssystems wird nicht durch den Linux Agenten unterstützt, bitte prüfen Sie dafür die aktuellesten Release Notes
- Das Verzeichnis "VV" konnte nicht im Pfad /usr/share/rear/restore/ erstellt werden
- Abhängige Softwarekomponenten auf dem System fehlen z. B. isolinux
Handlungsempfehlung:
Bitte prüfen Sie zunächst die installierte Version über folgenden Befehl:
rear -V
Sollte die Version kleiner als 2.6 sein, können Sie diese auf 2.6 aktualisieren.
Im Fall einer neueren Version müssten Sie ein Downgrade in Form einer Deinstallation und einer neuen Installation der Version 2.6 vornehmen.
Bitte prüfen Sie ob das Verzeichnis "VV" im Pfad "/usr/share/rear/restore/" erstellt werden konnte.
Erstellen Sie es, falls es noch nicht vorhanden sein sollte.
Fehlende Softwarekomponenten werden in vielen Fälle in der Ausgabe des "mkrescue" Befehls erwähnt.
Bitte prüfen Sie dazu diesen Artikel.
Wichtig:
Diese Informationen beziehen sich auf die aktuellste Version des Linux Agenten. Es kann sein, dass ältere Versionen des Agenten mit älteren Versionen von Relax and Recover kompatibel sind.
Weitere Informationen und Anleitung zu Relax and Recover finden Sie unter:
https://relax-and-recover.org/documentation/
Relax and Recover auf Funktion überprüfen
Sie können über den folgenden Befehl prüfen, ob Relax und Recover ein Wiederherstellungs ISO erstellen kann.
Das erzeugte ISO kann dann durch den Linux Agenten weiter modifiziert werden.
rear -D -v mkrescue
Sollte es nicht möglich sein ein ISO zu erzeugen finden Sie in dem resultierenden Logfile weitere Informationen zur Fehlerursache.
Bitte beachten Sie, dass es sich bei Relax and Recover nicht um eine Software der TERRA CLOUD handelt und daher kein weitergehender Support angeboten werden kann.
VMware vSphere Recovery Agent
Zertifikatsfehler
Fehlerbild:
Der Status eines vSphere Recovery Agenten der Version 8.87 oder neuer zeigt, wie in der Abbildung unten, einen Zertifikatsfehler.
Zusätzlich ist die Sicherung und Wiederherstellung der Umgebung nicht möglich.

Ursache:
Der vSphere Recovery Agent speichert den Public Key des ESXi/vCenter Server Zertifikats der zu sichernden Umgebung.
Sofern sich der Public Key durch z. B. einen Austausch des Zertifikats ändert, tritt das Fehlerbild auf.
Lösung:
Bitte wählen Sie im TERRA CLOUD Backup Portal die Checkbox nebem dem betroffenen Computer aus und führen Sie die Aktion "Zertifikat erneut anheften" aus.
Weitere Informationen zu diesem Fehlerbild finden Sie in der Dokumentation des Agenten.
VSPH-W-10577 Informationen über VSS-Schreiber für VM VM-Name konnten nicht abgerufen werden. Anwendungsfähiges Backup kann nicht erstellt werden
Fehlerbild:
Sie erhalten bei einem Backup Job (mit der Option anwendungskonsistentes Backup) eines vSphere Recovery Agent folgende Warnmeldung im Logfile:
VSPH-W-10577 Informationen über VSS-Schreiber für VM VM-Name konnten nicht abgerufen werden. Anwendungsfähiges Backup kann nicht erstellt werden
Mögliche Ursachen:
- Das Gastbetriebssystem der virtuellen Maschine verfügt über dynamische Datenträger, diese werden nicht durch Microsoft VSS unterstützt und können durch das TERRA CLOUD Backup nicht anwendungskonsistent gesichert werden
- Speicherplatz auf den Datenträgern reicht nicht mehr aus, um eine Schattenkopie zu erstellen
Handlungsempfehlung:
In Verbindung mit dem Gastbetriebssystem Windows Server 2016 und 2019 konnte der folgende VMware Artikel Abhilfe schaffen:
https://kb.vmware.com/s/article/52815
Alternativ können Sie mit folgender Anleitung überprüfen, ob die Virtualisierung über VMware auf die VSS Komponenten innerhalb der virtuellen Maschine zugreifen kann:
- Erstellen Sie über VMware einen Snapshot, inklusive der Option "Gast-Dateisystem stilllegen"
- Wechseln Sie nach der Erstellung des Snapshots in den folgenden Pfad des Dateisystems des Gastbetriebssystems:
C:\ProgramData\VMware\VMware Tools\
- Öffnen Sie die Datei "backup.xml" in dem vss_manifest.zip" Archiv
- Prüfen Sie den Inhalt und die Größe der "backup.xml" Datei, diese sollte Informationen zu verschiedenen VSS Writern enthalten
Sollte die Datei keine Informationen über die VSS Writer enthalten, kann VMware nicht korrekt auf diese zugreifen.
In diesem Fall handelt es sich nicht um ein Problem mit dem vSphere Recovery Agent.
VSPH-W-10566 Es konnte nicht geprüft werden, ob SQL Server-Transaktionsprotokolle für Instanz ESXI-SQL auf VM {1} gekürzt wurden.
Fehlerbild:
Sie erhalten bei einem Backup Job eines vSphere Recovery Agent ab der Version 8.82 folgende Warnmeldung im Logfile:
VSPH-W-10566 Es konnte nicht geprüft werden, ob SQL Server-Transaktionsprotokolle für Instanz ESXI-SQL auf VM {1} gekürzt wurden.
Ursache:
Der vSphere Recovery Agent kann bei einer deutschen SQL Installation nicht prüfen ob die Transaktionsprotokolle abgeschnitten wurden.
Vermutlich tritt dieses Fehlerbild bei allen nicht-englischen Installationen auf.
Handlungsempfehlung:
Bitte ändern Sie die Einstellung für die Kürzung der Transaktionsprotokolle auf "Sicherung nur mit Kopie" (siehe Screenshot) ab.
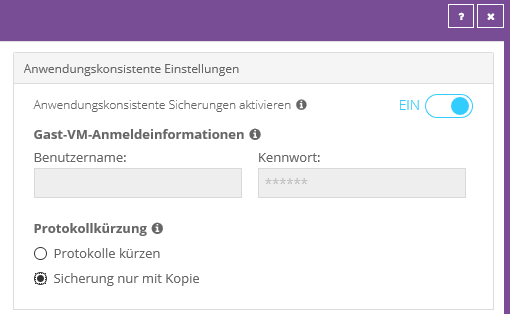
Die Transaktionsprotokolle können Optional über Boardmittel von Microsoft SQL abgeschnitten werden. Alternativ können Sie in der VM einen Windows Agenten inklusive SQL Plug-in installieren und die Datenbank über einen SQL Backup Job schützen. Bei diesem Szenario sichern Sie das System über ein Hostbackup und die Datenbank zusätzlich über ein andwendungskonsistentes Agent Backup.
VSPH-W-10274 Virtuelle Maschine "Name der VM" konnte nicht unterdrückt werden. Die Sicherung wird stattdessen einen absturzkonsistenten Snapshot versuchen
Fehlerbild:
Sie finden im Logfile folgende Fehlermeldung:
VSPH-W-10274 Virtuelle Maschine "Name der VM" konnte nicht unterdrückt werden. Die Sicherung wird stattdessen einen absturzkonsistenten Snapshot versuchen.
Ursache:
Der vSphere Recovery Agent kann über das vCenter das Filesystem innerhalb der VM nicht anhalten, da die Funktion "Quiesce guest file system" nicht verfügbar ist.
Handlungsempfehlung:
Bitte prüfen Sie, ob Sie im vCenter die unten abgebildete Option bei der Erstellung eines Snapshots zur Verfügung steht.
Überprüfen Sie ob die VMware Tools innerhalb der VM installiert und auf dem aktuellen Stand sind.
Sollte es weiterhin nicht möglich sein diese Funktion zu nutzen, wenden Sie sich bitte an den VMware Support, da es sich um ein Problem mit dem Hypervisor handelt.
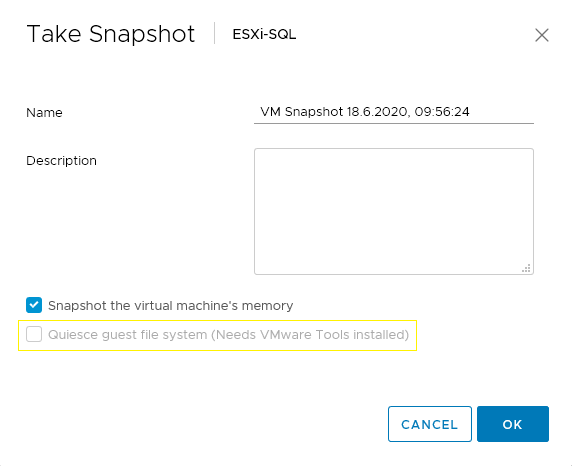
VSPH-I-10525 Auf VM XYZ ist eine alte Version der VMware-Tools installiert. Aktualisieren Sie die VMware-Tools auf die aktuelle Version
Fehlerbild:
Sie erhalten im Logfile die Information, dass die installierten VMware-Tools auf einer VM veraltet sind und somit keine anwendungskonsistente Sicherung erstellt werden kann.
Ursache:
Für eine anwendungskonsistente Sicherung müssen die Microsoft VSS-Komponenten innerhalb der VM angesprochen werden, um diesen Funktion nutzen zu können, muss mindestens die Version 11 oder höher installiert sein.
Handlungsempfehlung:
Bitte prüfen Sie die Versionsnummer der VMware Tools z.B. im vCenter und aktualisieren Sie diese.
Nach der Aktualisierung ist ein anwendungskonsistentes Backup möglich.
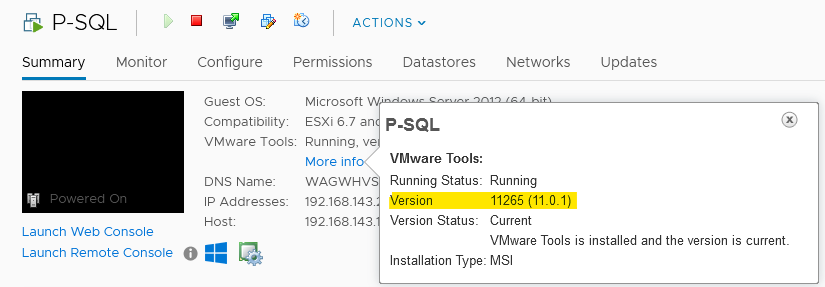
Weitere Informationen finden Sie in der aktuellen Dokumentation des vSphere Recovery Agents.
VSPH-E-10247 Von Server "XY" wurde eine ungültige Antwort empfangen. Ziel ist möglicherweise kein vCenter/ESXi
Fehlerbild:
Sie finden im Logfile einer Sicherung folgende Fehlermeldung:
VSPH-E-10247 Von Server "XY" wurde eine ungültige Antwort empfangen. Ziel ist möglicherweise kein vCenter/ESXi.
Ebenfalls kann es sein, dass Sie folgende Situation beim Login in das betroffene vCenter auffinden:
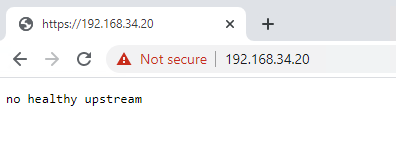
Ursache:
Das interne Zertifikat der vCenter Appliance ist höchstwahrscheinlich abgelaufen. Generell stellt der Agent fest, dass die Funktionalität des Ansprechpartners (ESXi Host / vCenter) aktuell nicht gegeben / gestört ist.
Handlungsempfehlung:
Bitte überprüfen Sie die Situation des vCenters / ESXi Hosts und erneuern Sie das benötigte Zertifikat, sofern es abgelaufen ist.
VSPH-E-10250 VSPH-E-10253 Beim Kommunizieren mit Server "XY" wurde ein unbekannter Fehler empfangen.
Fehlerbild:
Die Sicherungen des Agenten schlagen fehl und folgender Fehler ist im Logfile ersichtlich:
VSPH-E-10253 Beim Kommunizieren mit Server "XY" wurde ein unbekannter Fehler empfangen.
Bei der Bearbeitung der vorhandenen Jobs fragt der Agent nach Credentials des verwendeten VMware Benutzers.
Mögliche Ursache:
Ein nicht vom Agenten unterstütztes Sonderzeichen (z. B. §) befindet sich im Passwort des verwendeten VMware Benutzers.
Handlungsempfehlung:
Bitte überprüfen Sie das Kennwort und versuchen Sie, nur unterstützte Sonderzeichen zu verwenden: !@#$%^&*()_-+=[]{}|'";:<.>\/?
TERRA CLOUD Backup Satellit
Backup "Job kann nicht am Vault registriert werden. Er ist möglicherweise bereits im Vault vorhanden." (Nur in Verbindung mit einem Satelliten)
Ursache:
Sofern der Satellit auf "Bypass inaktiv" steht, kann ein Computer oder ein Backup Job nicht direkt auf dem Basevault registriert werden, da der Basevault als aktuelles Sicherungsziel in den Vault-Einstellungen hinterlegt ist.
Lösung:
Bitte hinterlegen Sie die lokale IP-Adresse des Satelliten in den Vault-Einstellungen und versuchen Sie erneut den Job anzulegen oder den Computer hinzuzufügen.
Uhrzeit im Satellit stimmt nicht
Ursachen:
Die Bandbreitenlimitierung hält sich an die empfangende Uhrzeit. Wenn die Uhrzeit nicht synchron ist, funktioniert der Plan nicht korrekt.
Lösung:
Bitte Port NTP Port 123/UDP vom Satelliten ins Internet freigeben.
SSET-F-04145 Fehler beim Öffnen von Datei 192.168.187.69"00000-KUNDE 00000-KUNDE Jobname 0000000X":: für Ausgabe
Mögliche Ursachen:
- Der Satellit hat seine Speicherkapazitätsgrenze von 90 % erreicht und nimmt deshalb keine Datensicherungen mehr entgegen.
- Die Vebindung (Heartbeat) zwischen dem Satelliten und dem Basevault ist seit 30 Tagen oder länger getrennt
Kontrolle:
Die aktuelle Speicherkapazität kann über das Satelliteninterface und die Verbindung zum Rechenzentum über Konnektivität kontrolliert werden.
Lösung bei nicht ausreichendem Speicher:
A) Wechsel auf einen größeren Satelliten.
B) Bereinigung des Satelliten über das Webinterface - Löschung von nicht mehr benötigten Jobs / Systemen
Sofern eine Interfaceversion < 0.11.11.3 installiert ist, kontaktieren Sie bitte den TERRA CLOUD Support, um eine Terminabstimmung für eine Remote Session zwecks Interfaceupdate / Bereinigung zu vereinbaren.
Hier ist die Löschung über das Interface noch nicht möglich.
Lösung bei fehlender Konnektivität zum Rechenzentrum:
Bitte prüfen Sie die notwendigen Ports für die Verbindung zwischen dem Satelliten und dem Rechenzentrum. Schauen Sie ebenfalls, ob der Replikationsdienst des Satelliten ggf. gestoppt ist. Ein laufender Replikationsdienst wird benötigt, damit der Satellit sich bei unserem Basevault melden kann.
Wiederherstellung nicht möglich, wenn das Safeset offline ist
Fehlerbild:
Sie erhalten nach dem Start einer Wiederherstellung im TERRA CLOUD Backup Portal die folgende Fehlermeldung:

Ursache:
Das für die Wiederherstellung ausgewählte Safeset ist auf dem verbundem Vault nur als "Offline Safeset" verfügbar.
Bei einem "Offline Safeset" liegen auf dem Vault nur Metadaten für das Safeset vor (Safesetnummer, Sicherungszeitpunkt, nativ geschützte Datenmenge uvm.), jedoch sind die Nutzdaten auf diesem Vault nicht gespeichert.
Dies tritt auf, wenn z. B. eine Datensicherung von einem TERRA CLOUD Backup Satelliten über das Webinterface gelöscht wurde (das Safeset wird nur vom Speicher des Satelliten gelöscht) und die TERRA CLOUD Backup Agenten danach keine Sychronisation durchgeführt haben.
Die lokalen Metadaten der Agenten beinhalten die Information, dass Safeset X für eine Wiederherstellung vom verbundenem Vault zu Verfügung steht, jedoch wurden die Nutzdaten auf dem Satelliten in diesem Beispiel schon entfernt, damit ist eine Wiederherstellung von diesem Safeset von diesem Vault nicht möglich.
Lösung:
Um eine Wiederherstellung des betroffenen Safesets durchführen zu können, müssen Sie den vorhandenen Eintrag im Reiter Vault-Einstellungen anpassen und hier die lokale IP des Satelliten durch die Basevault Adresse (vault-wmhX-bvXY.terracloud.de) anpassen.
Nachdem Sie die Anpassung vorgenommen haben, muss der betroffene Backup Job zwingend synchronisiert werden, um die Metadaten des Agenten zu aktualisieren.
Solange die Anpassung greift, wird es nicht möglich sein, eine Sicherung des Agenten durchzuführen. Es empfiehlt sich also, die Anpassung vor dem nächsten Durchlauf des Zeitplans wieder rückgängig zu machen.
BMR-Wiederherstellung
Checkliste Fehlerdiagnose BMR-Wiederherstellung
Allgemein:
Bitte gehen Sie im Fehlerfall während oder nach einer BMR-Wiederherstellung die folgende Checkliste durch.
Anhand der Antworten kann das Fehlerbild, sofern es nicht bereits durch den Troubleshooting Guide abgedeckt wird, eingegrenzt werden.
Desweiteren ermöglicht die Checkliste eine schnelleren und effizienteren Support Prozess.
Checkliste:
- Handelt es sich um eine Produktivrücksicherung oder eine Testrücksicherung?
- Wann wurde das System zum letzten Mal in einer Testrücksicherung wiederhergestellt?
- Welche Version des Restore ISOs wurde verwendet? → Bitte verwenden Sie stets die aktuellste Version.
- Haben Sie einen datei- oder imagebasierten Backup Job wiederhergestellt?
- Tritt das Problem während der Konfiguration der Rücksichung auf? Falls Ja → Bitte prüfen Sie dazu die Vorgehensweise in der Dokumentation
- Haben Sie bereits Logdateien der BMR-Rücksicherungen gespeichert? Falls nein → Eine dafür finden Sie Anleitung unter Logdateien einer BMR-Rücksicherung speichern
- Erfolgte die Wiederherstellung auf ein physisches oder virtuelles System? Falls virtuell → welche Virtualisierungstechnik wird eingesetzt?
- Handelt es sich bei dem Ursprungssystem um eine BIOS oder UEFI Installation? → Die eingesetzte Firmware entscheidet z.B. bei Hyper-V die VM-Generation.
- Haben Sie alle Volumes wiederhergestellt oder nur die für das Betriebsystem notwendigen?
- Wurden bereits verschiedene Sicherungspunkte/Safesets für die Rücksicherung gewählt?
- Welche Rolle/Einsatzzweck hat das Ursprungssystem? → z.B. DC, MS-SQL, Fileserver usw.
Tipps:
Eine fehlerhafte Produktivrücksicherung ruft eine Stresssituation hervor und die Ausfallzeiten sollen so kurz wie möglich gehalten werden.
Die folgenden Tipps können die Entstörung vereinfachen und kostbare Zeit sparen.
Disaster Recovery Möglichkeiten:
Das folgende Ablaufschaubild zeigt Ihnen mögliche Workflows und Handlungsempfehlungen für verschiedene Disaster Recovery Szenarios auf.
Parallele Wiederherstellung:
Sie können gleichzeitig vom primären und sekundären Vault und ggf. einem Satelliten wiederherstellen.
Damit stehen Ihnen die Backups von mindestens zwei Quellen gleichzeitig zur Verfügung.
Die FQDNs und Öffentlichen IPs können Sie der Vault-Übersicht entnehmen.
Mehrere Lösungswege gleichzeitg verfolgen:
Beispiel:
Nach der Wiederherstellung des aktuellsten Safesets booted das System in einen Bluescreen, da es zum Sicherungszeitpunkt eine Beschädigung des Betriebsystems vorlag.
In diesem Szenario könnten Sie zwei ältere Safesets z.B. von vor drei Tagen und am Ende des letzten Monats gleichzeitig wiederherstellen, mit Hilfe der Parallele Wiederherstellung.
Durch diese Strategie verdoppeln sich die Chancen einen Sicherungspunkt zu treffen, welcher die Daten das System vor der Beschädigung des Betriebsystems beinhaltet.
Wiederherstellung in einer Disaster Recovery VM:
Die TERRA CLOUD bietet Ihnen die Möglichkeit eine virtuelle Maschine oder eine virtuelle Disaster Recovery Umgebung vollständig automatisiert bereitzustellen.
Nutzen Sie dieses Angebot um neben der Entstörung der primären Wiederherstellung eine sekundäre Wiederherstellung einzuleiten in eine völlig neu erstelle Umgebung auf Basis von Microsoft Hyper-V.
Sollte die Wiederherstellung auf dem ursprünglichen System/Umgebung nicht möglich sein, kann die Wiederherstellung in eine DRVM die Chance erhöhen.
Dokumentation der Wiederherstellung:
Bitte fügen Sie Screenshots von Fehlermeldung/Fehlverhalten direkt einem Support Ticket bzw. einer Anfrage bei.
Durch eine Dokumentation in Form der Checkliste und Screenshots verkürzen Sie den Teil der Informationsgewinnung in einem Support Ticket.
System startet nach einer Rücksicherung in einen Bootfehler/Bluescreen/Blackscreen
Fehlerbild:
Nach einer erfolgreichen BMR Rücksicherung zeigt das System nach dem Start einen Bootfehler, wie z.B. folgenden an:
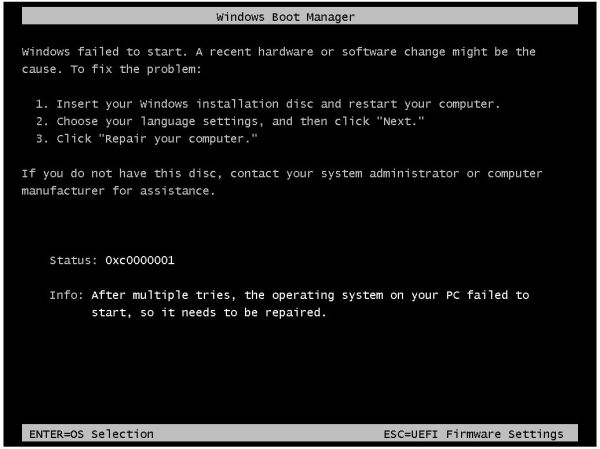
Vorgehensweise:
Bitte gehen Sie zunächst die Checkliste Troubleshooting BMR-Wiederherstellung durch und stellen Sie die Ergebnisse ggf. dem Support zur Verfügung.
Handlungsempfehlungen:
Bitte überprüfen Sie ob Sie den Fehler mit folgender Anleitung umgehen können.
BMR Rücksicherung des Betriebsystemvolumes:
- Führen Sie die BMR Rücksicherung erneut aus und sichern Sie ausschließlich das Volume für das Betriebssystem zurück
- Prüfen Sie ob das System nach der erfolgreichen Wiederherstellung booten kann
- Sofern das System booten kann, installieren Sie einen Windows Agenten in das System und registrieren Sie diesen im Portal
- Stellen Sie die verbleibenden Volumes über das Backup Portal wieder her, z.B. über die Wiederherstellung von einem anderen Computer
Logdateien im System Restore (BMR-Wiederherstellung)
Allgemein:
Zur Entstörung einer BMR-Rücksicherung kann es notwenig sein auf detailreiche Logdateien der Wiederherstellung zuzugreifen.
Die Wiederherstellungssoftware bietet in den Einstellungen drei verschiedene Detailgrade für die Logdateien:
- DEBUG
- LOG WARNING
- LOG ERROR
Die Option "DEBUG" bietet den höchsten Detailgrad und eignet sich damit für das Troubleshooting am besten.
Häufig besteht jedoch das Problem, dass die Logdateien nach der fehlerhaften Wiederherstellung durch den Neustart verworfen werden oder vorher nicht außerhalb des Systems gespeichert werden können.
Best Practice für die Bereitstellung von Logdateien einer BMR-Rücksicherung:
Die folgende Anleitung zeigt Ihnen einen empfohlenen Weg um Logdateien für die Entstörung einer BMR-Rücksicherung zu speichern und dem TERRA CLOUD Support zur Verfügung zu stellen.
Die Logfiles müssen außerhalb des für die Rücksicherung relevanten Speicherbereiches abgelegt werden. Dies kann auf eine Netzwerkfreigabe oder ein lokales Volume erfolgen.
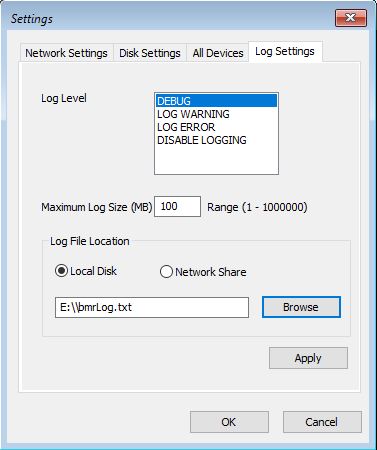
Vorgehensweise Netzwerkfreigabe:
Bitte starten Sie zur Entstörung die Wiederherstellung erneut und wählen Sie in den Einstellungen unter "Log Settings" das Log Level "DEBUG" aus.
Als Speicherziel können Sie Ihre Netzwerkfreigabe hinterlegen. Bitte übermitteln Sie nach der Rücksicherung die gespeicherte Logdatei dem TERRA CLOUD Support.
Vorgehensweise "Local Disk":
Bitte stellen Sie dem Zielsystem ein weiteres Volume mit mindestens 20 GB zur Verfügung, da die Logdateien je nach Wiederherstellungsumfang sehr groß werden könnne.
Sollte die nicht möglich sein, da es sich z.B. um einen physischen Server handelt, empfehlen wir eine Disaster Recovery VM in der TERRA CLOUD inklusiver einer zusätzlichen VHDX für die Logdateien zu buchen.
Die zusätzliche Festplatte können Sie über die Eingabeaufforderung im Hauptmenü der Wiederherstellungssoftware mit Hilfe von Diskpart einrichten.
Auf dem folgenden Screenshot wurde das Notepad über die Kommandozeile geöffnet um das per Diskpart eingerichtete Volume zu zeigen:
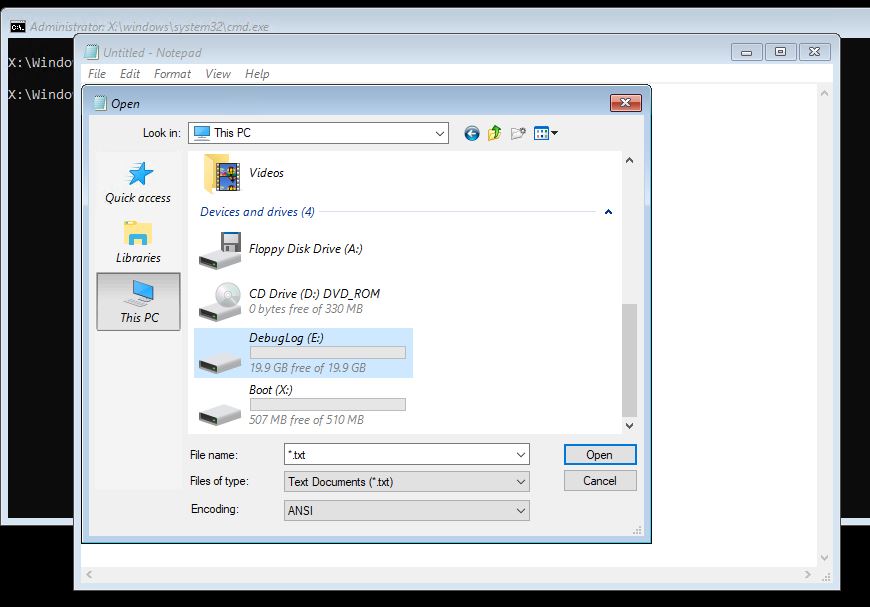
Bitte navigieren Sie danach in die Einstellungen unter "Log Settings" und wählen Sie das Log Level "DEBUG" aus. Als Speicherziel können Sie dann das extra eingerichtete Volume auswählen. Bitte stellen Sie nach dem Abschluss der Wiederherstellung die gespeicherte Logdatei aus dem Volume dem Support der TERRA CLOUD zur Verfügung.
Failed to GetDiskDetails
Fehlerbild:
Bei einer BMR Wiederherstellung erhalten Sie folgenden Fehler:
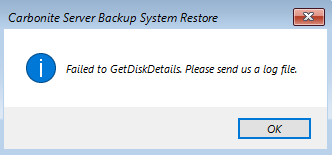
Mögliche Ursachen:
- Der zu wiederherstellende Agent hat eine neuere Version als das verwendete Restore ISO.
- Das ISO erkennt die Datenträger des betroffenen Systems nicht / Das System verfügt über keine validen Datenträger.
- Zuvor kam es zu einer weiteren Fehlermeldung.
Lösung:
1) Überprüfen Sie die Agentenversion des Quellsystems über das Backup Portal und schauen Sie, welche Version das Restore ISO besitzt. Zum Beispiel kann ein 9.10er Agent nicht auf einem 8.90er Restore ISO wiederhergestellt werden.
2) Öffnen Sie die Eingabeaufforderung (Command Prompt) im Menü des Restore ISOs und überprüfen Sie über Diskpart, ob das System über Datenträger verfügt. Falls es sich bei den vorhandenen Datenträgern um spezielle Modelle handelt, können Sie die benötigten Treiber über folgende Option einspielen:
Restore ISO Menü öffnen -> Settings -> Disk Settings -> Update Driver
3) In diesem Fall handelt es sich höchstwahrscheinlich um einen Folgefehler. Es empfiehlt sich, das Logfile der Wiederherstellung zu überprüfen:
Restore ISO Menü öffnen -> Show Log
Meistens befinden sich die relevanten Einträge am Ende des Logfiles.
Vault data corrupted
Fehlerbild:
Sie erhalten nach der Eingabe des Verschlüsselungskennwortes die Fehlermeldung "Vault data corrupted", in Verbindung mit einem System Restore Wizard 9.10.1014.
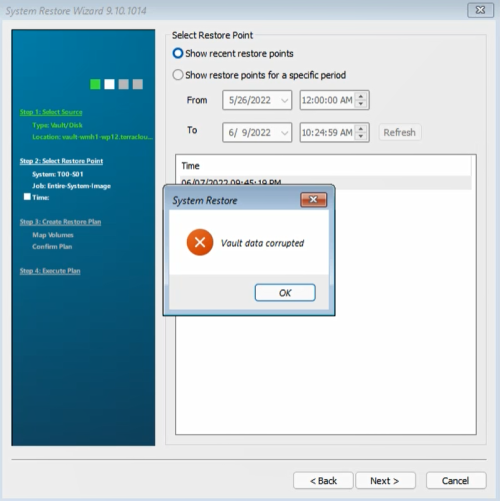 Ursachen:
- Es wurde ein falsches Verschlüsselungskennwort eingetragen, in der System Restore Wizard Version 9.10.1014 wird jedoch eine falsche Fehlermeldung ausgegeben
- Dieses Verhalten wurde bereits an das Entwicklerteam des Softwarehersteller weitergeben
- Dieses Verhalten wurde bereits an das Entwicklerteam des Softwarehersteller weitergeben
- Bei der Auswahl des Computers wurde ein Linux System ausgewählt, der System Restore Wizard unterstützt jedoch nur Windows Agenten
Handlungsempfehlung:
Bitte konfigruieren Sie anhand der Anleitung das Logging für eine BMR Wiederherstellung und führen Sie erneut einen Wiederherstellungsversuch aus.
Prüfen Sie ob im Logfile "bmrLog.txt" eine Fehlermeldung zu einem falschen Verschlüsselungskennwort vorhanden ist:
msg:Password is incorrect
Device Manager failed to get current information
Diese Fehlermeldung erscheint nachdem das Passwort für den Backup-Job Restore Point eingegeben wurde.
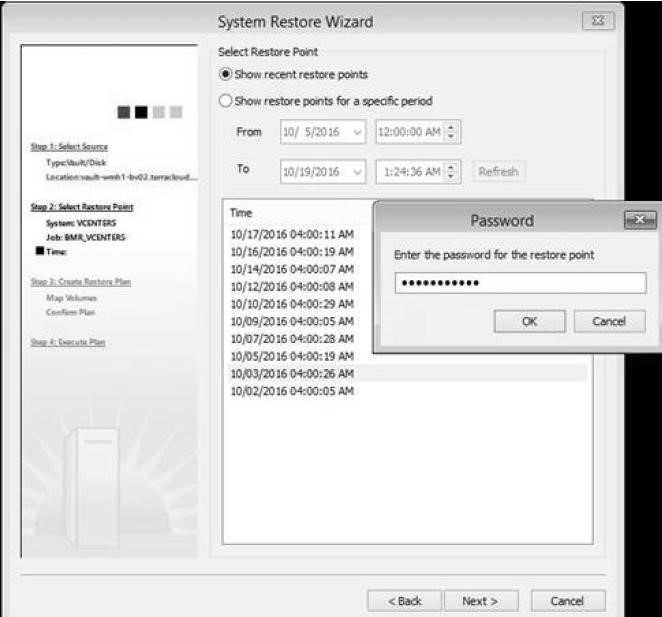
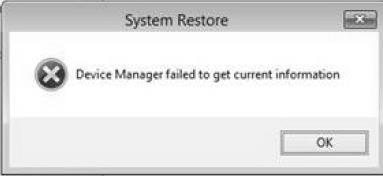
Lösung:
Der SCSI Controller Treiber von "Paravirtual" muss auf "LSI Logic SAS" abgeändert werden.
BIOS System auf einem EFI System wiederherstellen
Fehlerbild:
Sie erhalten im "Step 3 Map Volumes" bei der Wiederherstellung folgende Fehlermeldung:
You cannot drag the volume to this position because the new order of partitions would violate Microsoft Rules.
The partitions schould be in the following order: Recovery (if any), ESP(if any), MSRP and then primary data partition(s).
Please delete all partitions on this disk and try again.
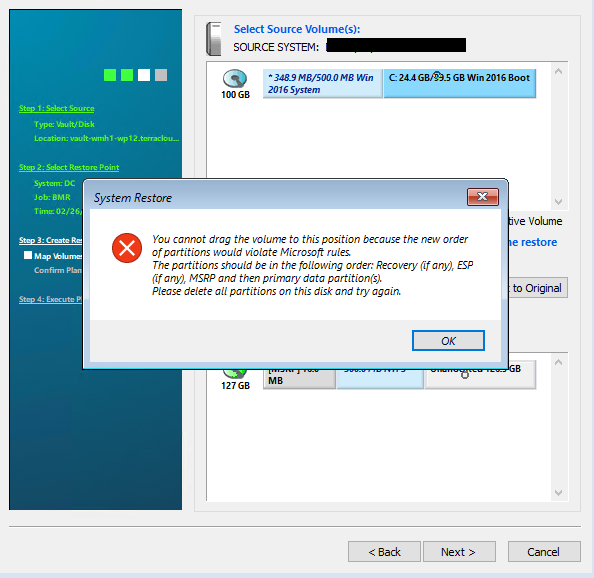
Ursache:
Sie sehen in dem Screenshot das Fehlerbild, dass eine Hyper-V GEN1 VM (BIOS) in einer Hyper-V GEN2 VM (UEFI) wiederhergestellt werden soll. Dies ist auf Grund der unterschiedlichen Firmware der beiden VM Generationen nicht möglich.
Lösung:
Hyper-V:
Erstellen Sie eine neue VM in der gleichen Generation wie das Ursprungssystem (in dem oberen Beispiel müsste eine GEN1 VM für die Wiederherstellung anglegt werden).
VMware:
Sie können über das vCenter oder den Host Client eine neue VM erstellen und über die Option "Firmware" entscheiden ob EFI (Benötigt für GEN2 VMs) oder BIOS (Benötigt für GEN1 VMs)
für die VM verwendet werden soll.
In folgendem Screenshot sehen Sie den Erstellprozess einer VM im vCenter:
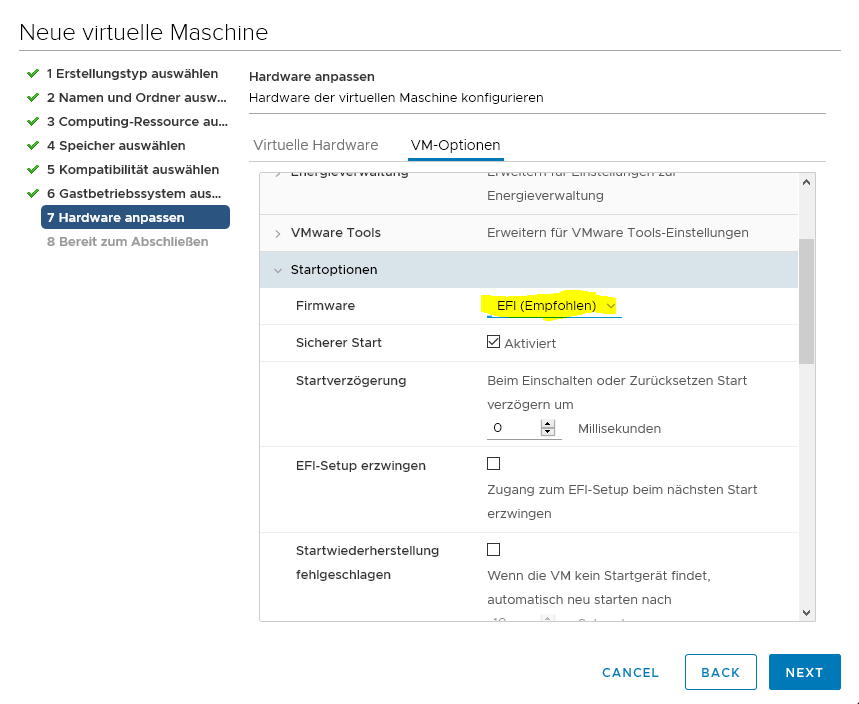
TERRA CLOUD IaaS VM:
Sie können bei der Bestellung einer IaaS VM kurz vor dem Abschluss der Konfiguration entscheiden ob eine GEN1 oder GEN2 bereitgestellt werden soll, diese Generation muss wieder der Firmware bzw. der Generation des Ursprungssystems entsprechen.
Alternative Lösung:
Die Wiederherstellung eines BIOS System auf einem UEFI System ist möglich, jedoch nicht empfohlen.
Konvertieren Sie dazu das Ziel Volumes für die Systempartition auf GPT (per Rechtsklick auf das Festplattensymbol) und ziehen Sie nur die Systempartition aus der Quelle auf dieses.
Die Microsoft System Reserved Partition muss aus dem Backup nicht auf das Ziel gezogen werden, lediglich weitere Datenpartitionen, falls vorhanden.
EFI System auf einem BIOS System wiederherstellen
Fehlerbild:
Sie erhalten im "Step 3 Map Volumes" bei der Wiederherstellung folgende Fehlermeldung:
an EFI System partition can only be restored to a System using UEFI not a BIOS system
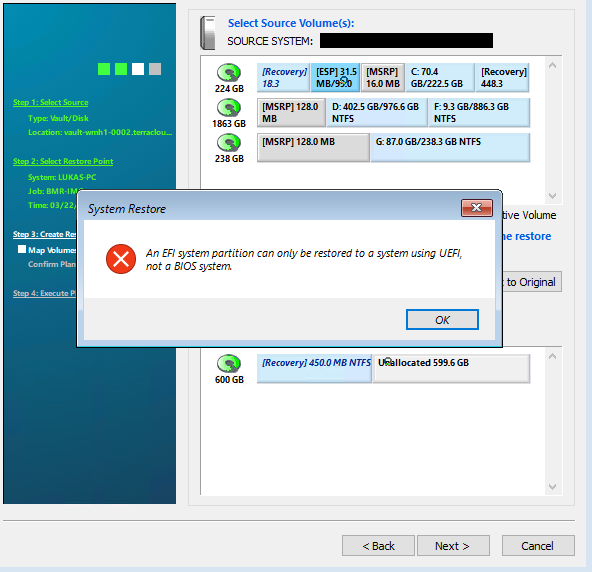
Ursache:
Sie sehen in dem Screenshot das Fehlerbild, dass eine Hyper-V GEN2 VM (UEFI) in einer Hyper-V GEN1 VM (BIOS) wiederhergestellt werden soll. Dies ist auf Grund der unterschiedlichen Firmware der beiden VM Generationen nicht möglich.
Lösung:
Hyper-V:
Erstellen Sie eine neue VM in der gleichen Generation wie das Ursprungssystem (in dem oberen Beispiel müsste eine GEN2 VM für die Wiederherstellung anglegt werden).
VMware:
Sie können über das vCenter oder den Host Client eine neue VM erstellen und über die Option "Firmware" entscheiden ob EFI (Benötigt für GEN2 VMs) oder BIOS (Benötigt für GEN1 VMs)
für die VM verwendet werden soll.
In folgendem Screenshot sehen Sie den Erstellprozess einer VM im vCenter:

TERRA CLOUD IaaS VM:
Sie können bei der Bestellung einer IaaS VM kurz vor dem Abschluss der Konfiguration entscheiden ob eine GEN1 oder GEN2 bereitgestellt werden soll, diese Generation muss wieder der Firmware bzw. der Generation des Ursprungssystems entsprechen
Fehler bei Zuordnung der Volumes
Fehlerbild:
Sie erhalten im "Step 4 Execute Plan" bei der Wiederherstellung folgende Fehlermeldung:
Error mapping volume name "<<Laufwerksbuchstabe>>" to volume GUID
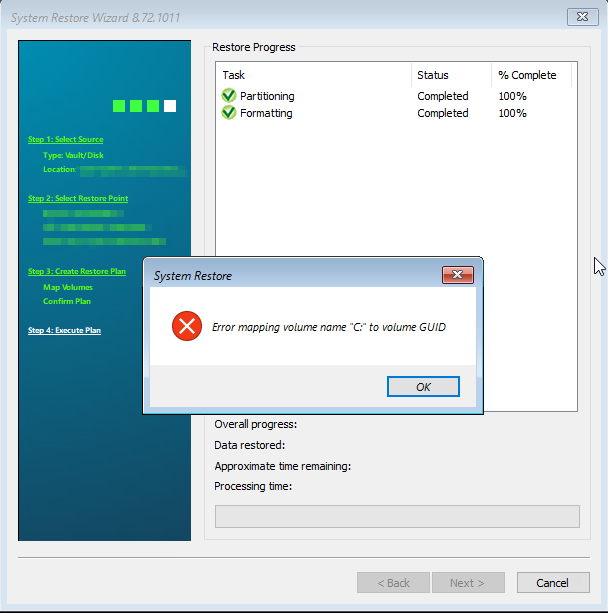
Ursache:
Dieser Fehler tritt auf, wenn der Restore mit dem 8.72 ISO gestartet wird und das Backup mit dem 8.90 Agenten durchgeführt wurde.
Lösung:
Sofern Sie anschließend das ISO mit der Version 8.90 nutzen sollte die Wiederherstellung reibungslos funktionieren.
Bootable Media Creator
Erstellen eines bootfähigen USB Sticks schläg mit Error code 1 fehl
Fehlerbild:
Sie erhalten den folgenden Fehler, wenn Sie mit dem Bootable Media Creator einen bootfähigen Stick vorbereiten möchten:
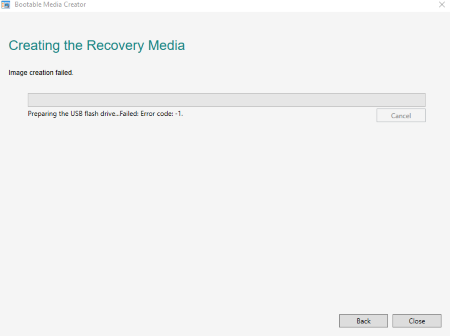 Ursache:
Dieses Fehlerbild tritt nur bei Systemen die nicht in englischer Sprache installiert sind auf.
Wir haben dies bereits an unseren Softwarehersteller weitergeleitet, damit die Unterstützung für weitere Sprachen ausgeweiten wird.
Lösung:
Bitte erstellen Sie das ISO zunächst lokal. Über die Software Rufus können Sie einen bootfähigen Stick erstellen.
Bei weiteren Anliegen zögern Sie nicht uns per Mail (support@terracloud.de) oder telefonisch unter (-850) zu kontaktieren.
Ihr TERRA Cloud Team

